
Celebrate the Good in Yourself...with these free cards + Adobe Illustrator tutorial!

This post is sponsored by Adobe Creative Cloud.
“How do I find the confidence to…
share my work on Instagram consistently?
try new mediums?
pursue art professionally?”
The list goes on.
Creative confidence is a topic that I get asked about all the time. In order to create a career that you love, you must first start with loving yourself.
Earlier this year, I made a post on Instagram about celebrating yourself and your accomplishments. I asked my audience to be brave and publicly share a "win" or something they were proud of with me in the comments section...and the results were amazing! People shared incredible accomplishments, both big and small, and others even joined in to cheer each other on.
“We can only love others as much as we love ourselves.” - Brené Brown
To remind us all to celebrate ourselves more often, I’ve partnered with Adobe Creative Cloud to bring you a series of free, printable self-love cards + phone wallpapers* I lettered and designed using Adobe Illustrator. Print one out and put it on your desk or download it and make it your phone wallpaper to give yourself a daily reminder to love yourself & celebrate your accomplishments.
*Note: These cards and wallpapers are for personal use only. Any commercial reproduction of this work is prohibited.


Better yet, what card would you make for yourself?
If you're feeling inspired after reading this post, I'd love to see you create a card of your own that reminds you to celebrate the good in you. I've outlined my entire process for quickly vectorizing my lettering from my iPad to my laptop using Adobe Capture (which can also be used on iOS and Android) and Adobe Illustrator. Scroll through it below!
Tutorial: Vectorize your hand lettering with Adobe Capture + Adobe Illustrator
***Before you begin this tutorial, you should have a piece of black lettering on a white background completed and saved to your iPad in your Photos/Camera Roll. I completed and saved mine from the iPad drawing app Adobe Sketch, but you can complete your base artwork however you like. This could also be achieved by drawing on white paper with black ink and then photographing it directly into the Adobe Capture app or using a scanner.
This method works best if you have a looser lettering style and you like a handmade look to your work. This is NOT a tutorial on how to plot perfect points with the Pen Tool. For that, I recommend checking out Spencer Charles!
Let's begin! Take out your iPad and open up the Adobe Capture app.
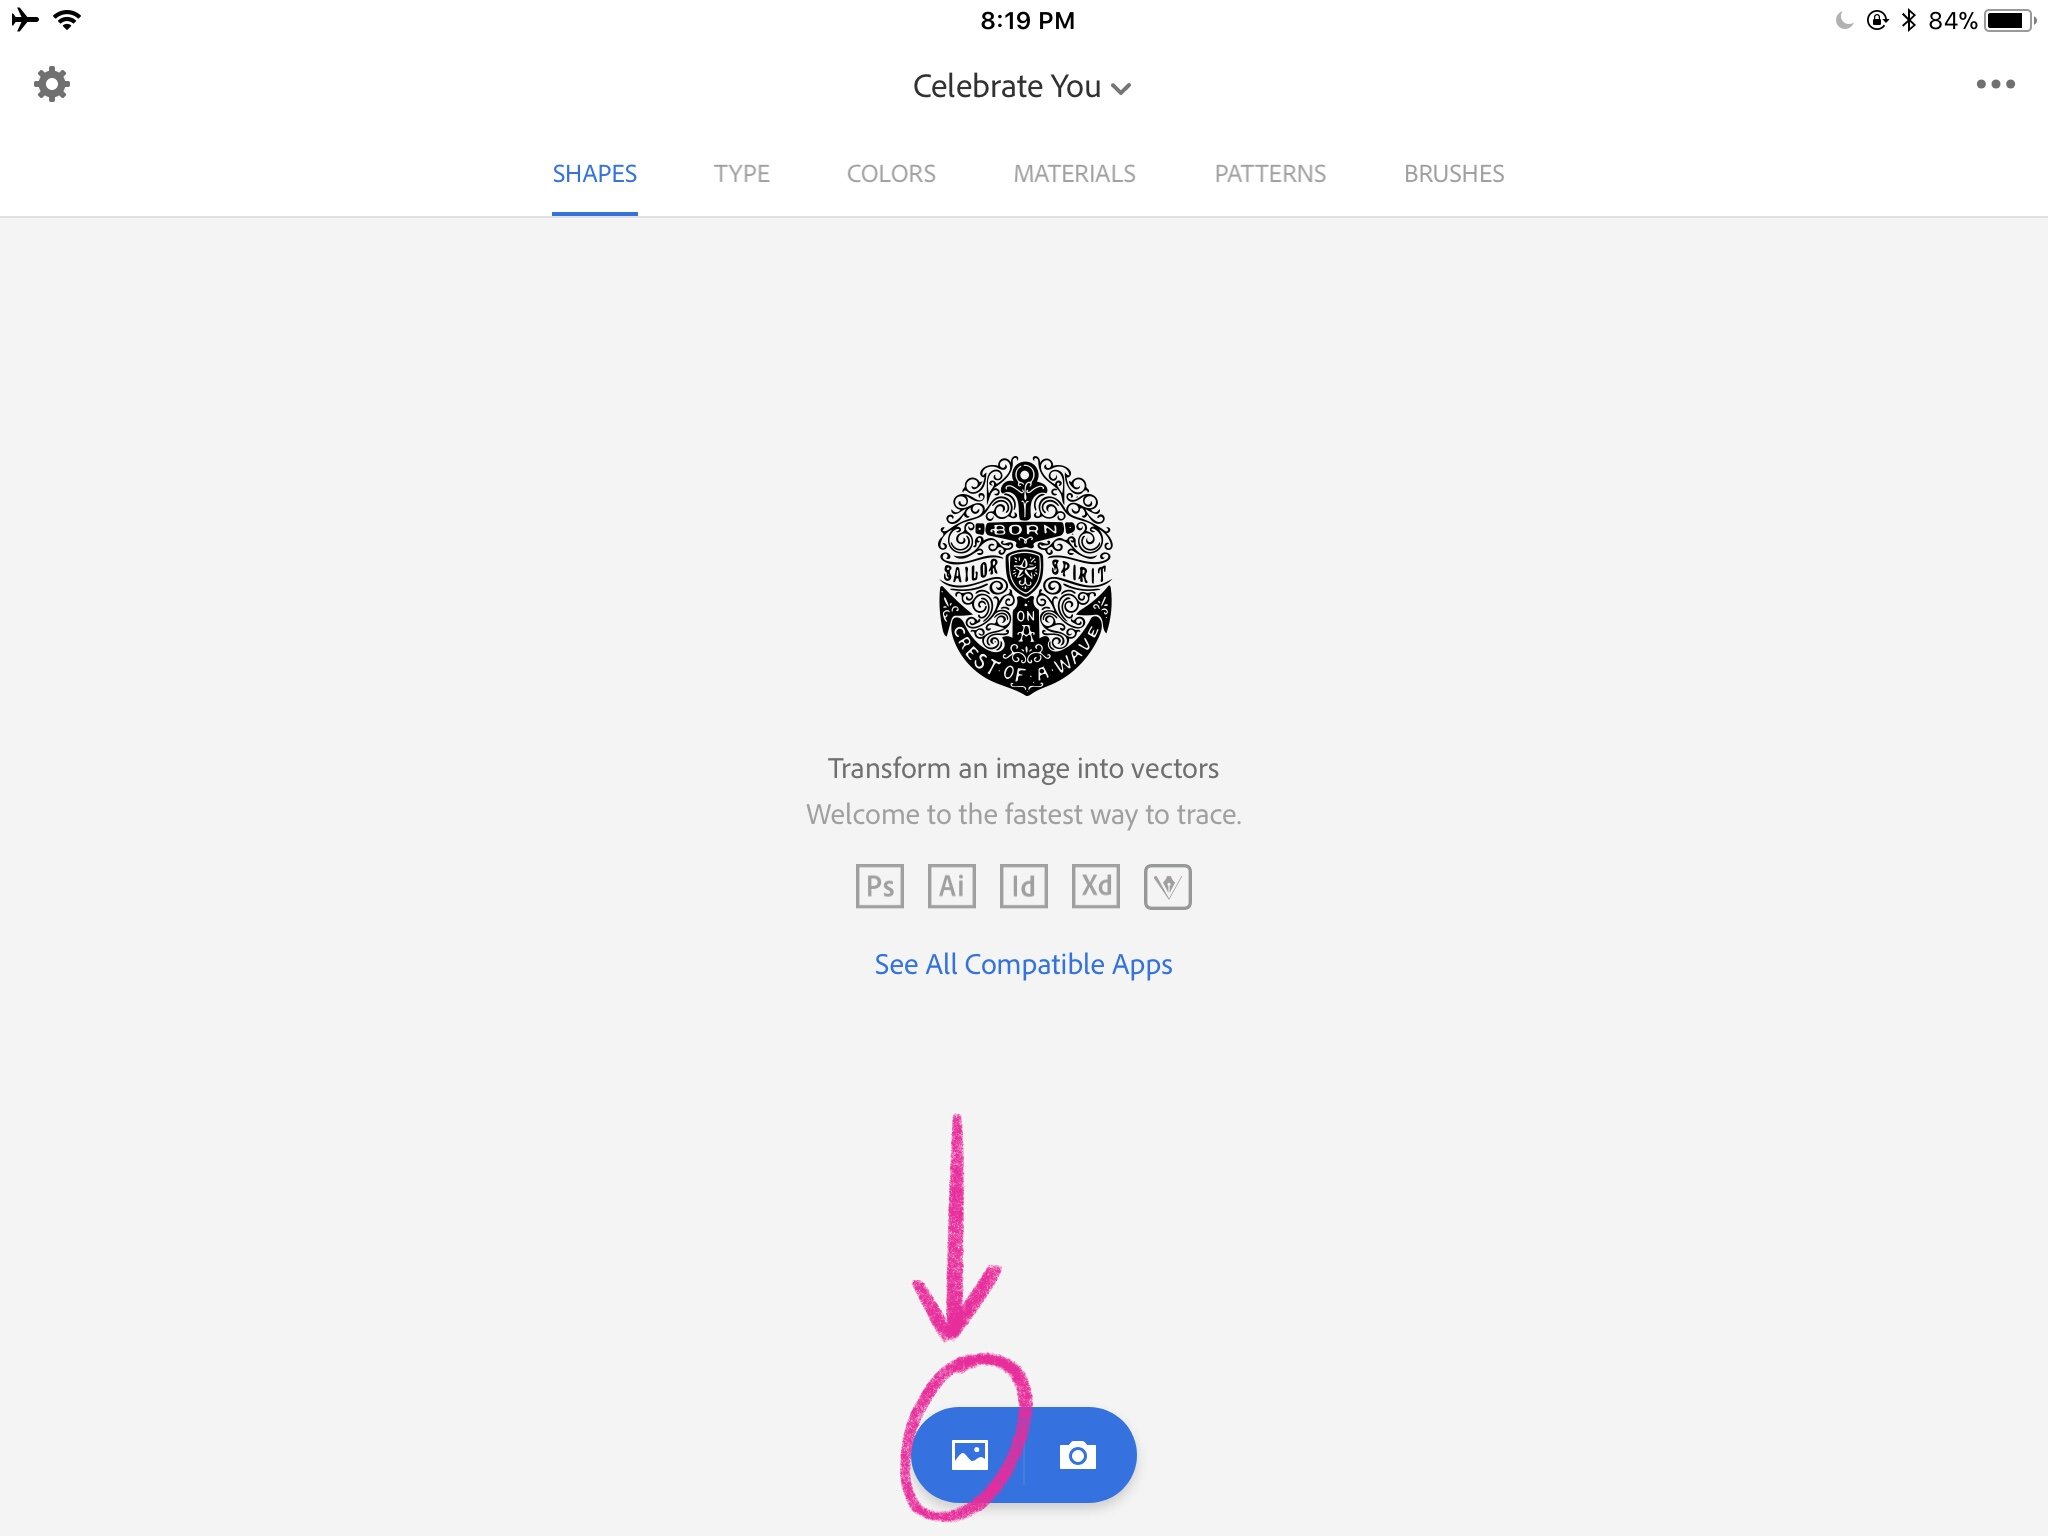
When you open up Adobe Capture and enter your Creative Cloud login info on your iPad, this will be the home screen. Tap on the image button at the bottom of the screen to import your drawing from your Camera Roll.
Alternatively, if you drew your lettering with black ink on white paper, you can tap the camera icon to the right of the image icon and photograph your lettering directly into Adobe Capture. In order for this to work, make sure you're in a well-lit space and get a nice, level overhead shot.
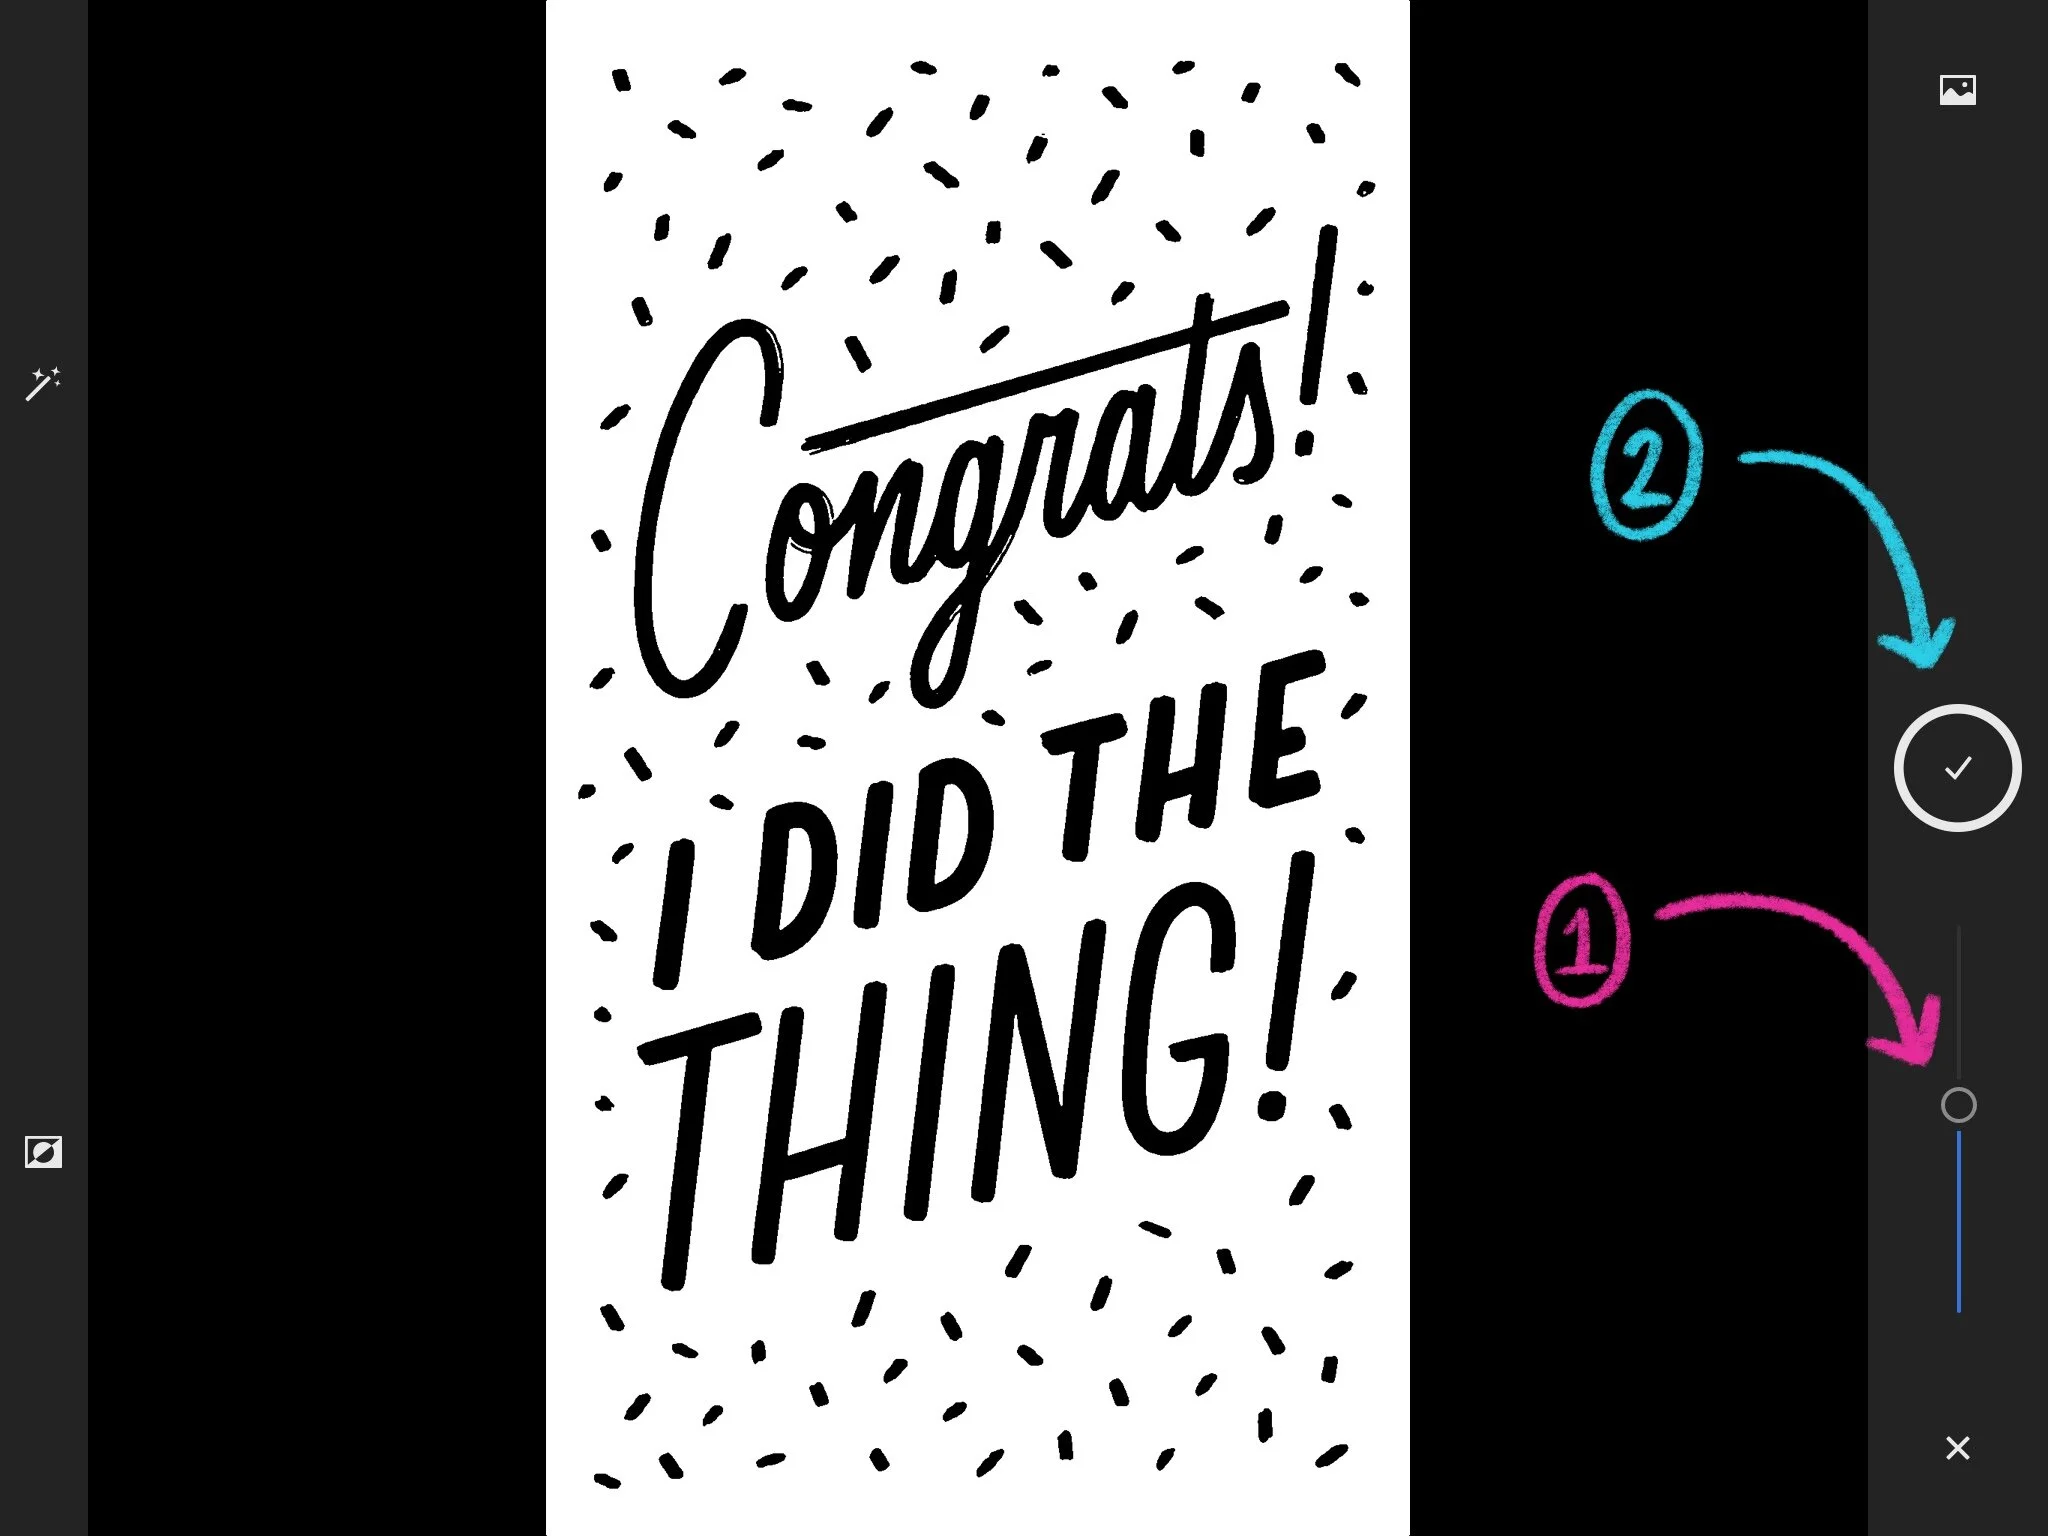
Once you've selected your black and white artwork, use the toggle on the bottom left of the screen to adjust the threshold of your image. If you slide it up, your image will darken and thicken. If you slide it down, your image will lighten and have more texture. Adjust this slider until you have your desired look and then tap on the checkmark icon to go to the next step.
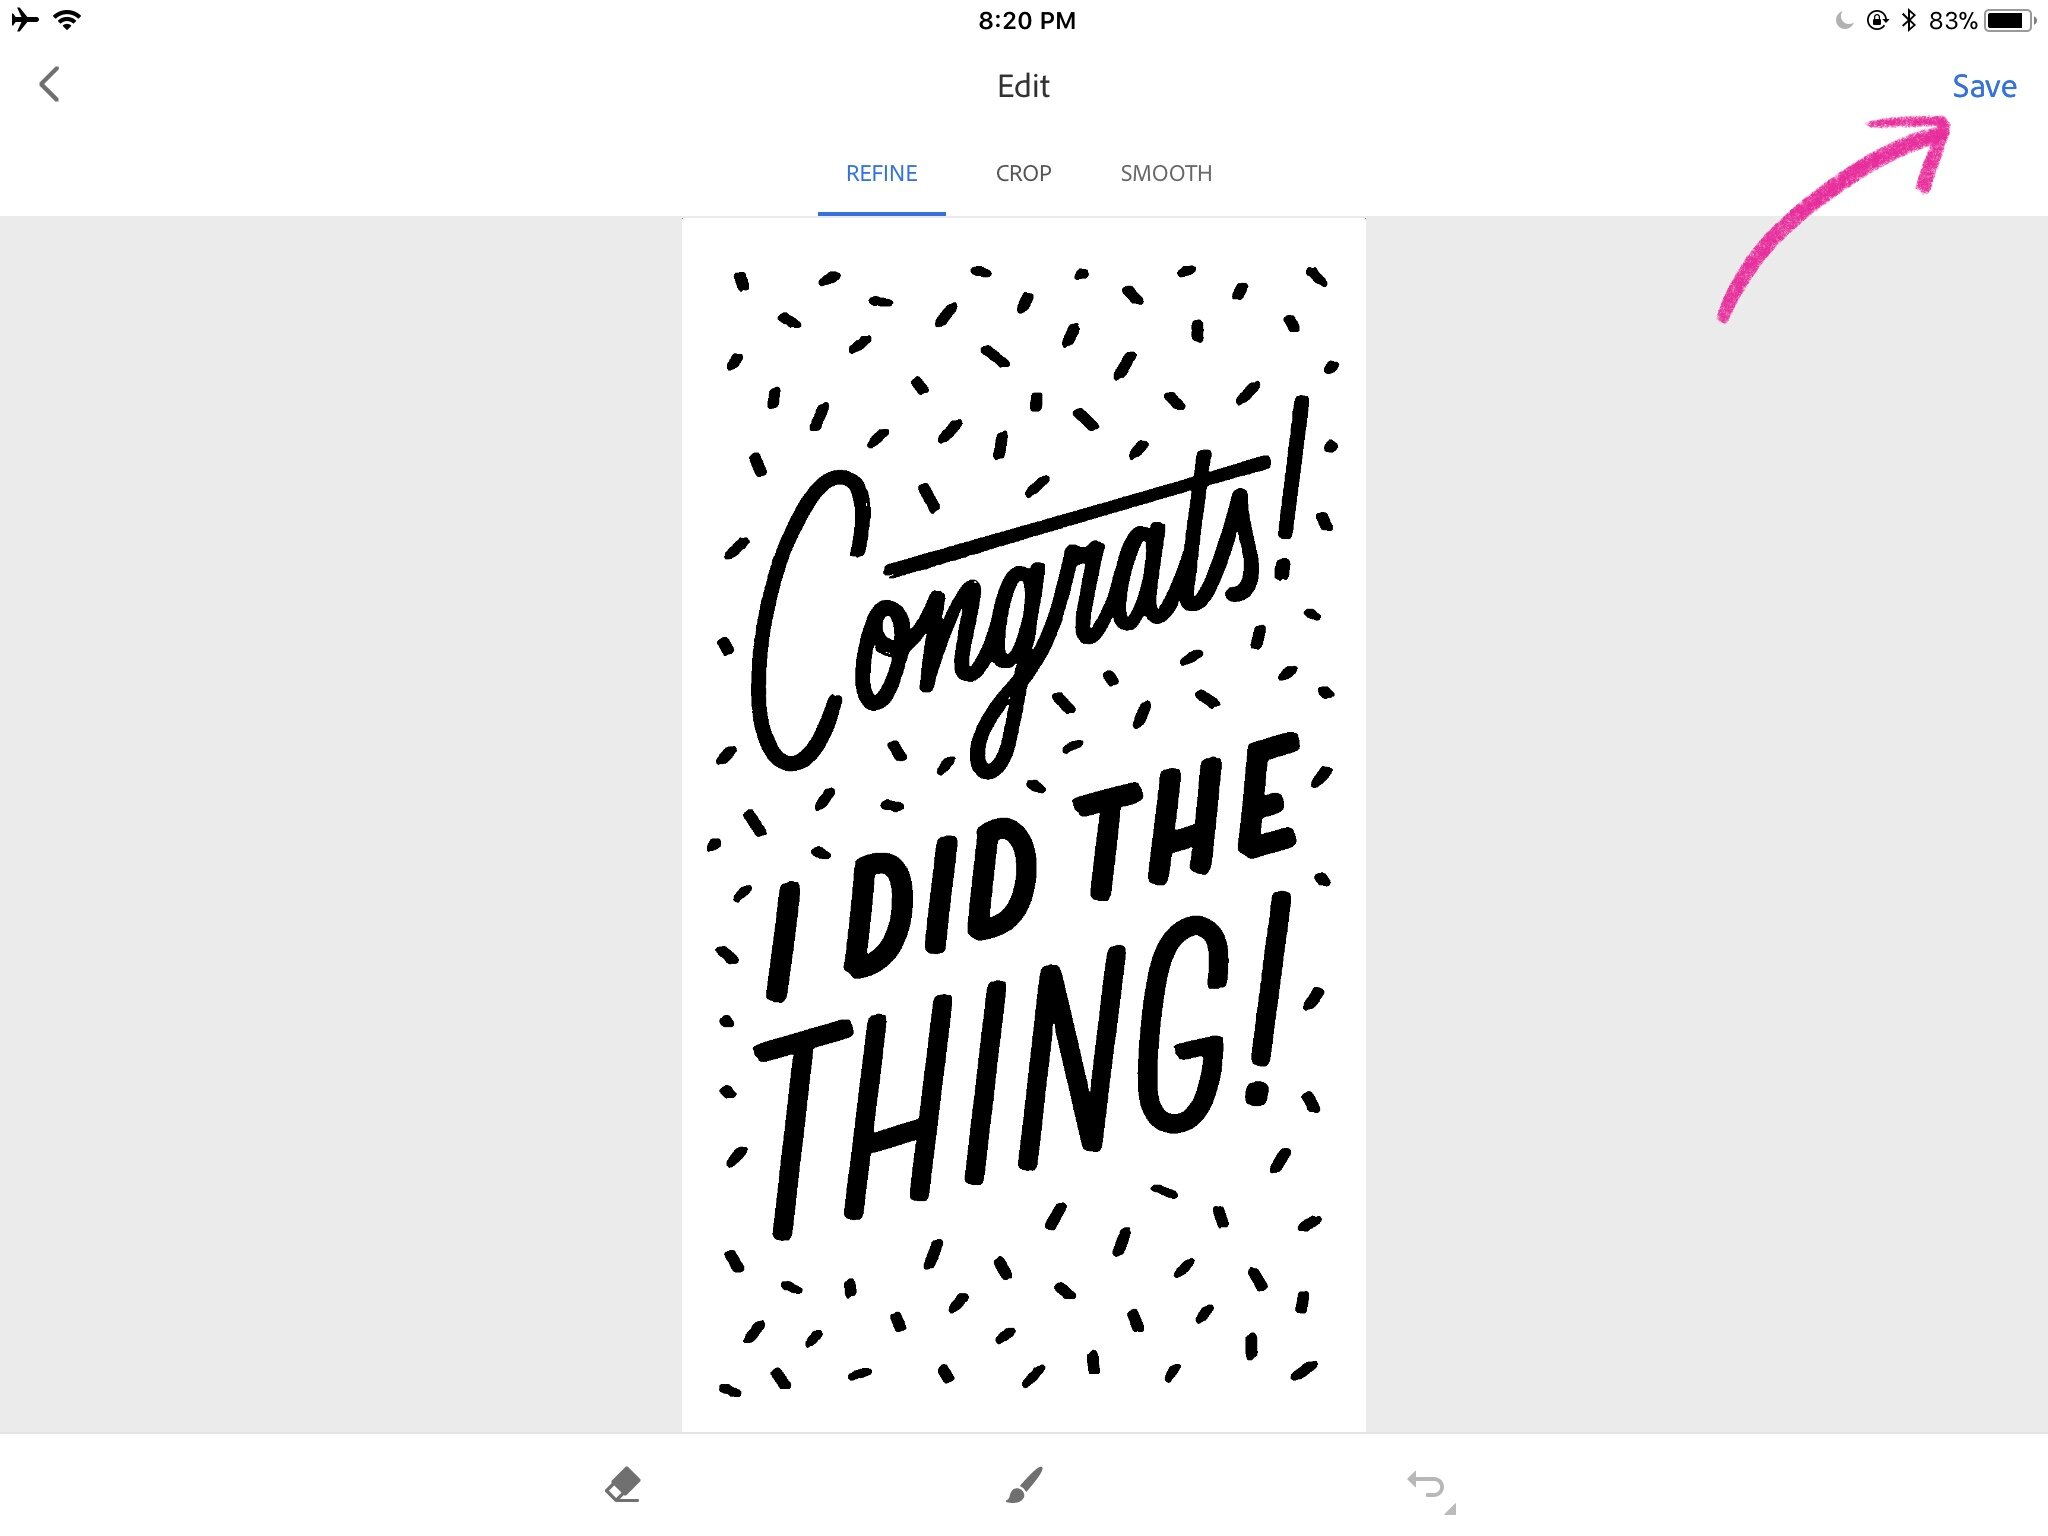
Now your lettering is vectorized! You can use the Refine, Crop, and Smooth tools at the top of the page to continue editing your lettering, but I like to stop here because it allows my lettering to retain the handmade look that I enjoy in my work. Tap 'Save' in the upper righthand corner.

Now it's time to transfer your vectorized lettering over to Adobe Illustrator on your computer. Make sure you're connected to WiFi and logged into Adobe Creative Cloud on both your laptop and iPad, and then press the icon I've circled. This 'Open In...' box at the bottom of the screen will pop up, and if you select Illustrator, the SVG file will open up in Illustrator on your computer like magic!
From this screen, you can also save your vectorized lettering to your Creative Cloud library or save it to your Adobe Capture library.
Time to switch apps and machines! Head on over to your computer now.

TA-DAAAAAA! I'm delighted and amazed at how seamless these programs work every time I use this function. Now your lettering is in Adobe Illustrator as an SVG file. Select all of your vectorized lettering and press ⌘C to copy it.

Open up a new document in your desired dimensions (I chose 1080px x 1920px to make it phone wallpaper size), and then press ⌘V to paste your artwork to your new artboard. Scale your lettering to your preferred size.

Zoom into your lettering to see if any areas need refinement. I like the roughness of most of my lines, but there are some areas (especially on certain curved areas) that could use some adjustments. Select the letter / paths you want to refine, and then press ⌘⇧N to bring up the Smooth Tool, or select it from your tool bar on the left.

Click and drag your Smooth Tool over the paths you want to smooth out. I like to drag my Smooth Tool in various directions along the path. As long as you're always dragging along the natural curve of the shape, your lines will start to smooth out. If you smooth too much for your liking, press ⌘Z to undo a stroke. Keep adjusting until you're satisfied. Repeat with other areas of your drawing.
Before smoothing:

After a little smoothing:

The Smooth Tool works well for larger, wobbly shapes, but if you encounter any tighter more jagged areas that you'd like to fix, I recommend using a combination of the Pencil Tool and Smooth Tool. See below!

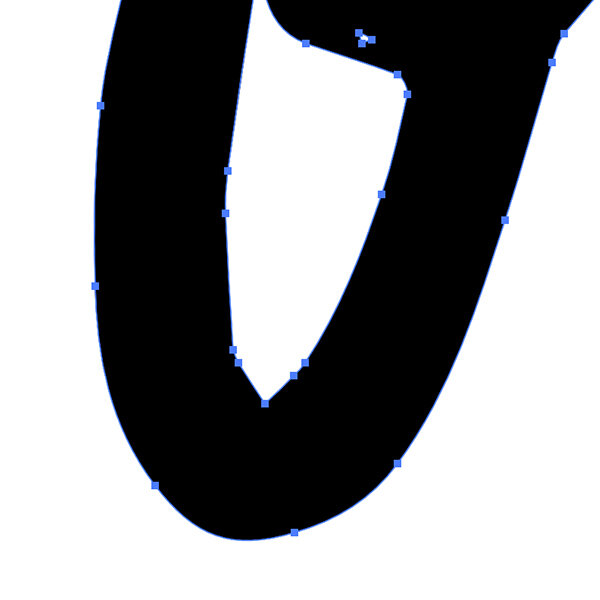
The Pencil Tool is similar to the Smooth Tool, but it draws and smooths at the same time. Select the jagged and tight area of your lettering that you want to fix (like the inside of my O here), and press ⌘N to bring up the Pencil Tool.

Click and drag the Pencil tool over the jagged area and try to draw in the curve you'd like instead. This might take a few tries, but once you get it close enough, you can switch back to your Smooth tool (⌘⇧N) and smooth out the final parts.
Before Pencil + Smooth tool:
After Pencil + Smooth tool:

Use the Smooth + Pencil tool over any areas of your lettering that you want to clean up. Once your lettering is refined to your liking, you can edit it, color it, and design it into your final piece.