
Colorful DIY Studio Kitchen Makeover
What began as leftover paint from a mural project turned into a mini kitchen renovation. That’s a completely normal thing to do with extra paint, right?
I refer to this makeover as an interior design version of the TV show Semi-Homemade with Sandra Lee (including that generous vodka pour for those who know the meme haha). I didn’t knock anything down or tear anything out. Instead, I used paint, stock cabinets, and new hardware to give the kitchen a colorful, custom look. Oh, and nine years of design + mural painting experience probably helped, too.
Here’s a peek inside the process, complete with sources and links to materials whenever possible! If I missed anything, leave a comment with your question and I’ll do my best to answer.
(Many of these will be affiliate links, which, if you don’t already know the drill, means that I get a commission on purchases made through these links at no extra cost to you. If you were already looking for any of these items, shopping them via these links is a fabulous way to support my business, as it compensates me for the labor of researching materials, designing the space, and creating this blog post ☺ )
BEFORE
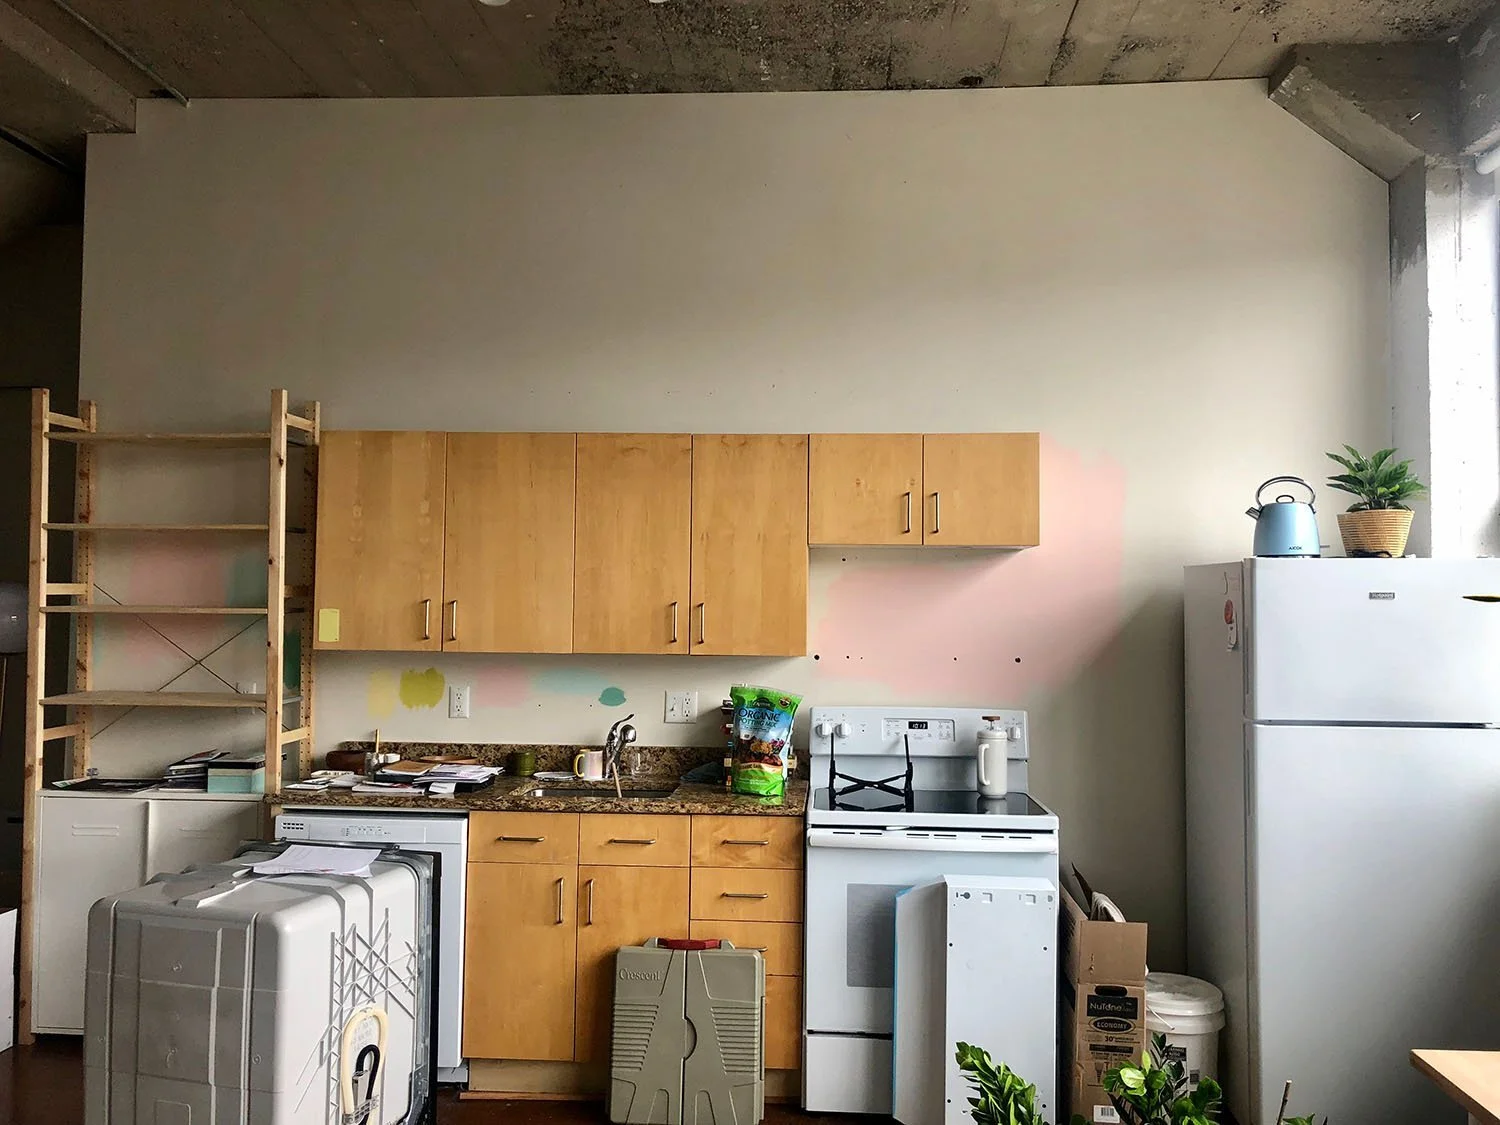
I’ll be honest: my first impression of the original kitchen can only be described as that 'womp womp’ sound from cartoons. However, having lived in New York prior to moving to Detroit, I was no stranger to making the most out of small kitchens. Naturally, I started with paint because it’s what I knew and slowly added new things over time as I researched how to DIY things online.
AFTER-ISH:? There was an in-between stage of this renovation where I excitedly yet hastily painted the cabinets and replaced the original brown countertop. You can read about it in this feature Domino Magazine did on my kitchen.
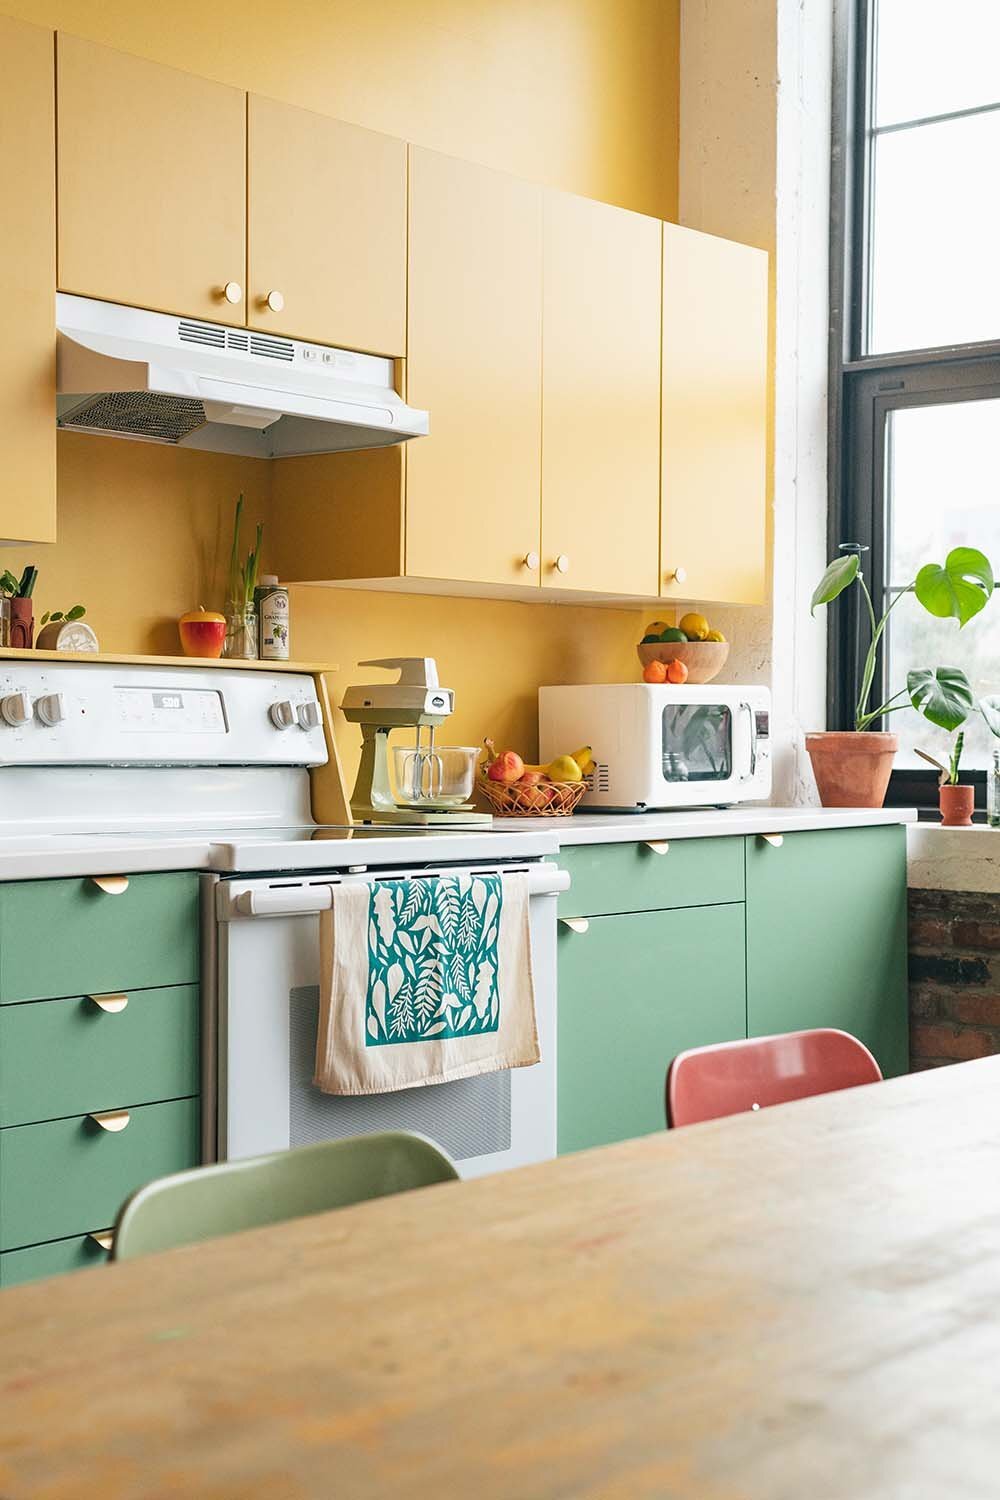
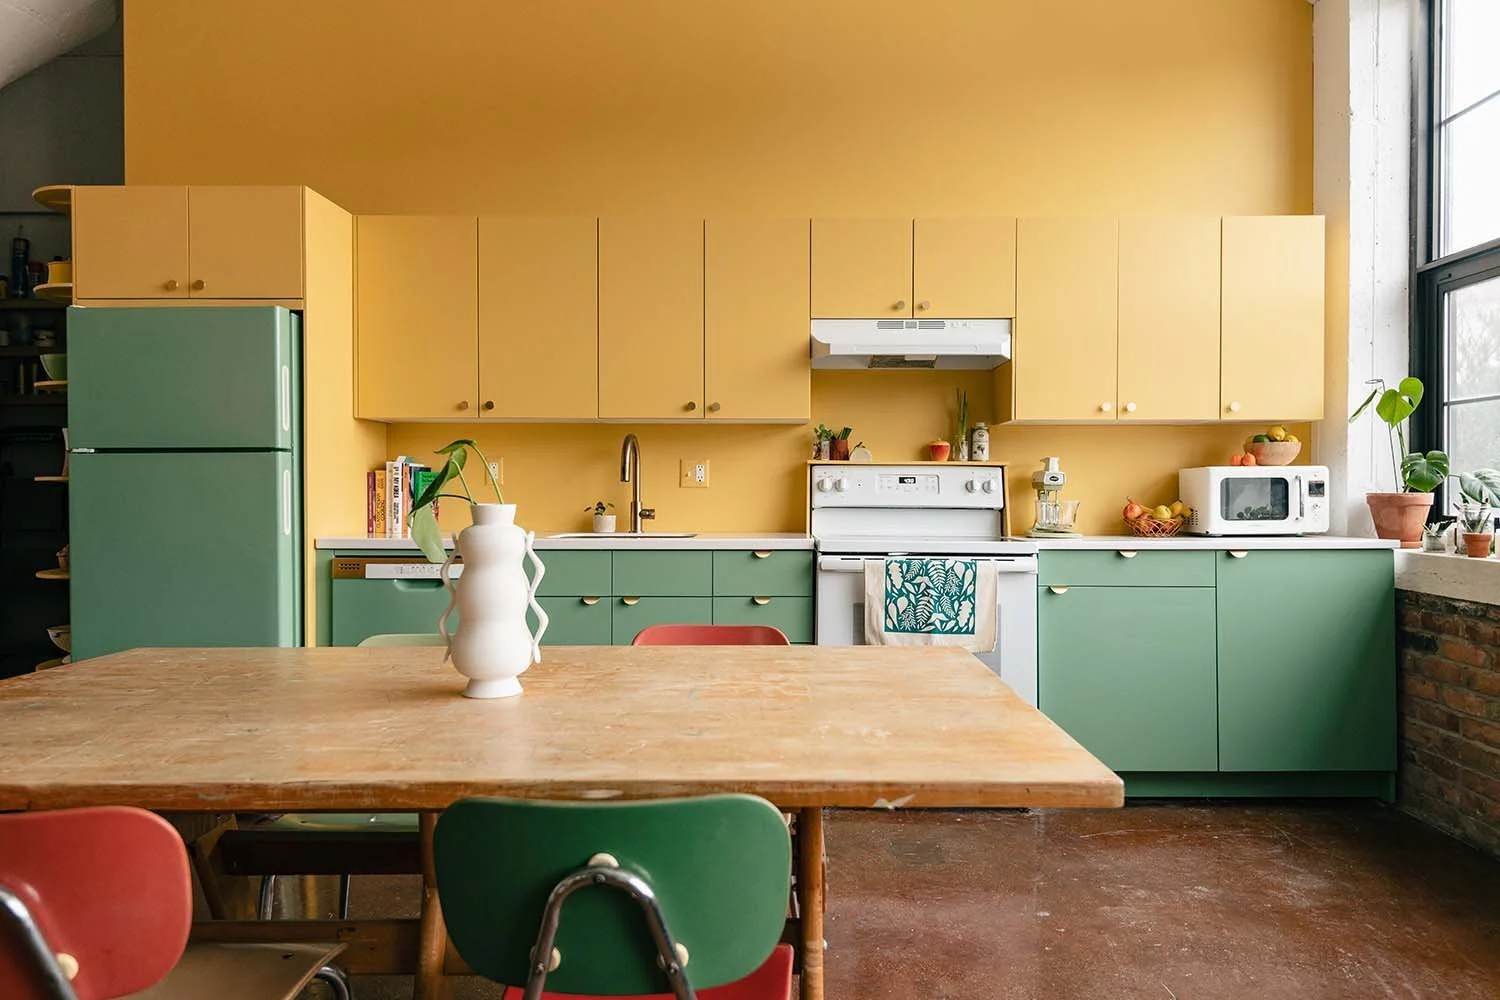
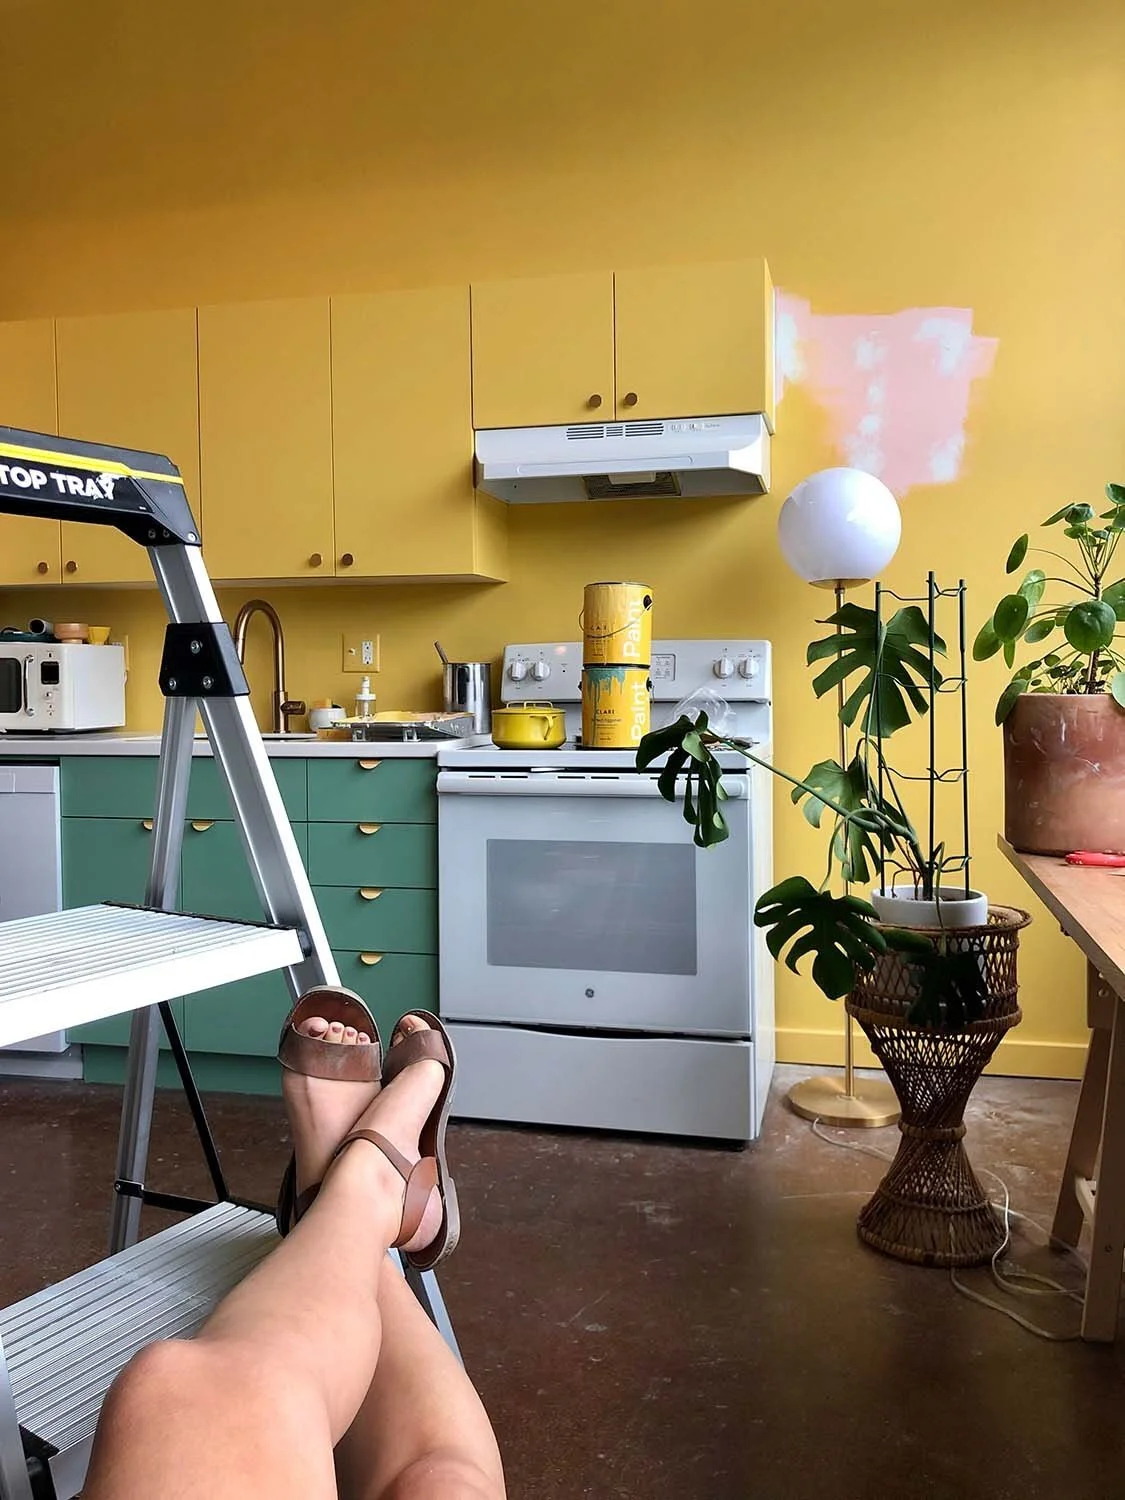
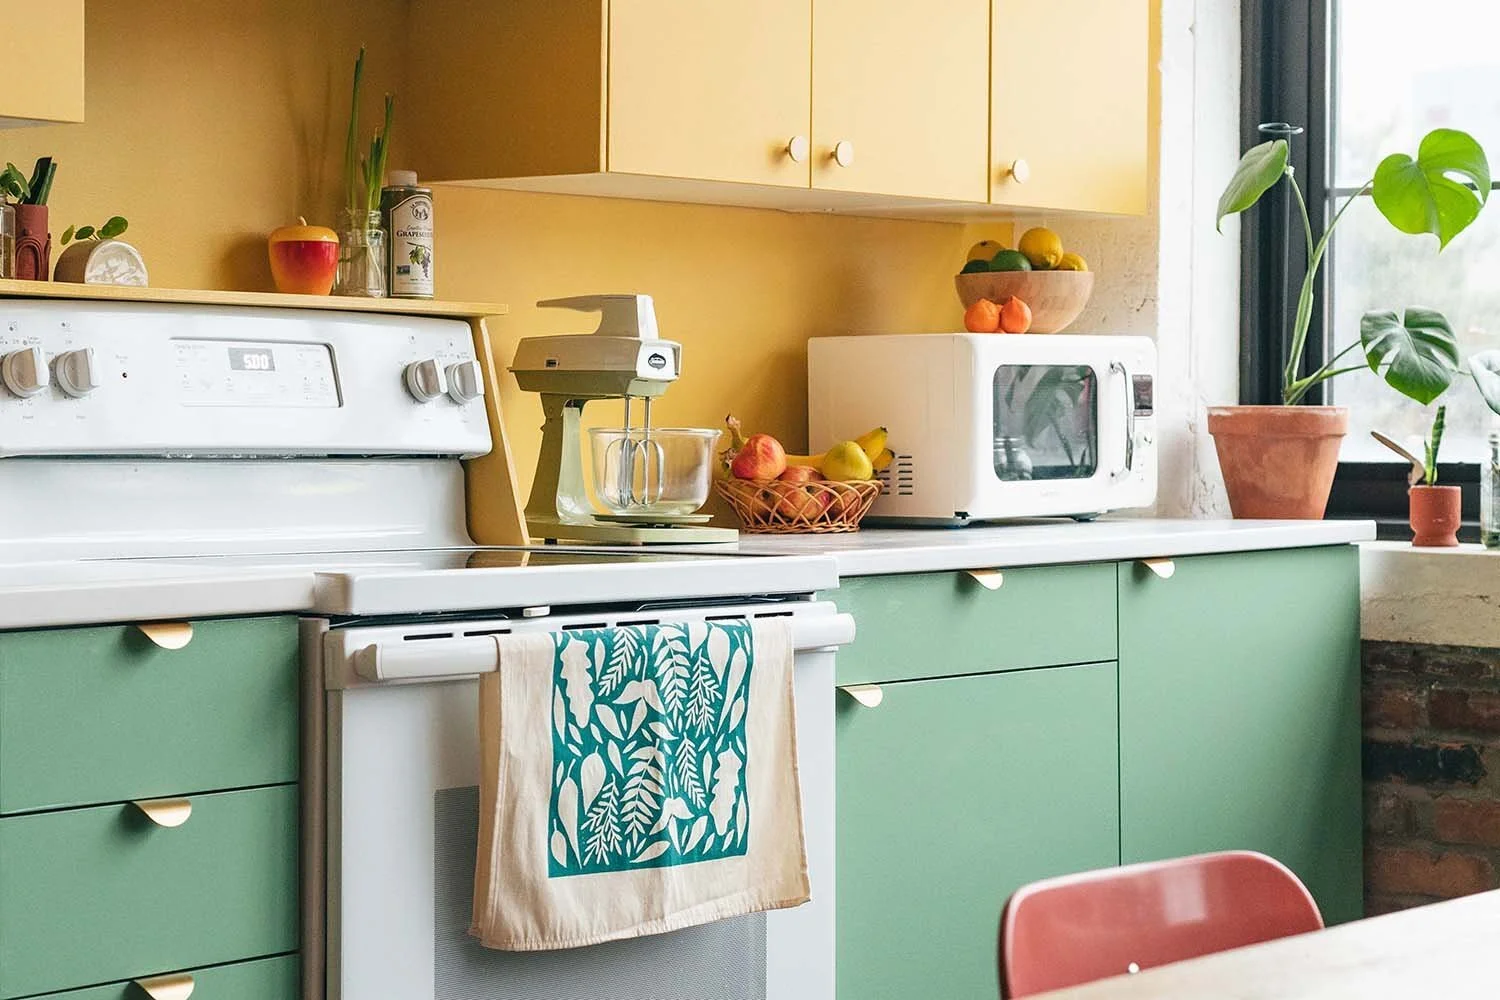
AFTER
Design Inspiration
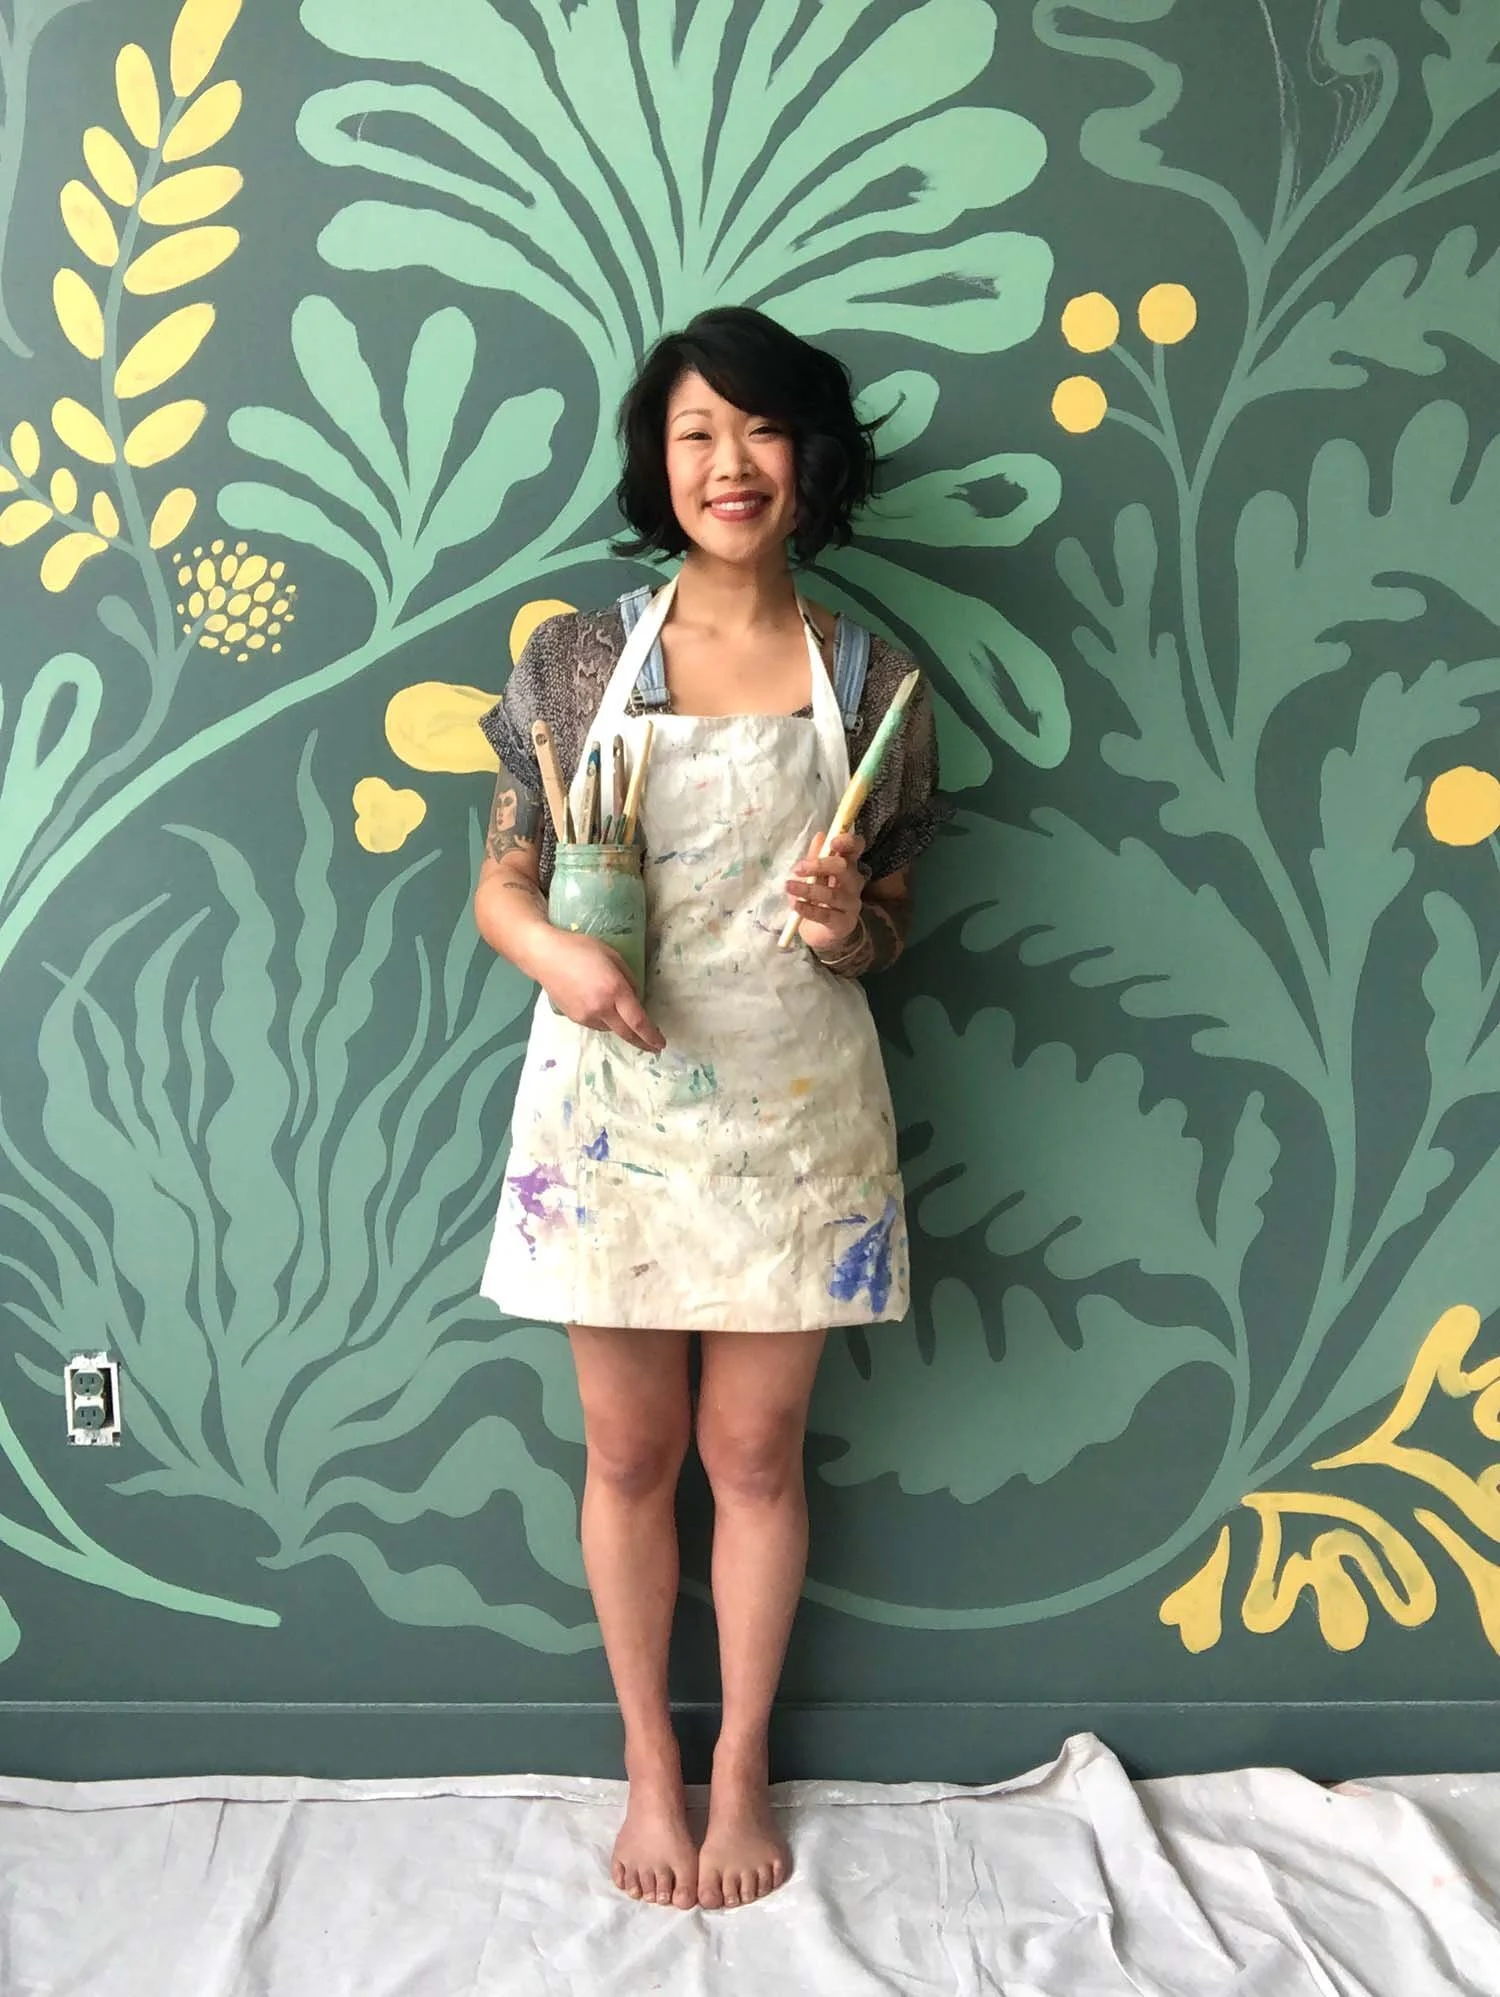
I wish I had a cooler story behind the inspiration for the color palette, but the honest answer is that I just had a lot of yellow and green leftover from a mural I painted (though I guess that mural was inspired by a series of paintings I made, which is interesting). But hey, sometimes using what you already have can be the best design decision, ya know? When I design something, it’s helpful to have one main idea, element, or constraint to start building from, so using the palette from the leftover paint actually helped me avoid overthinking things and just get started.
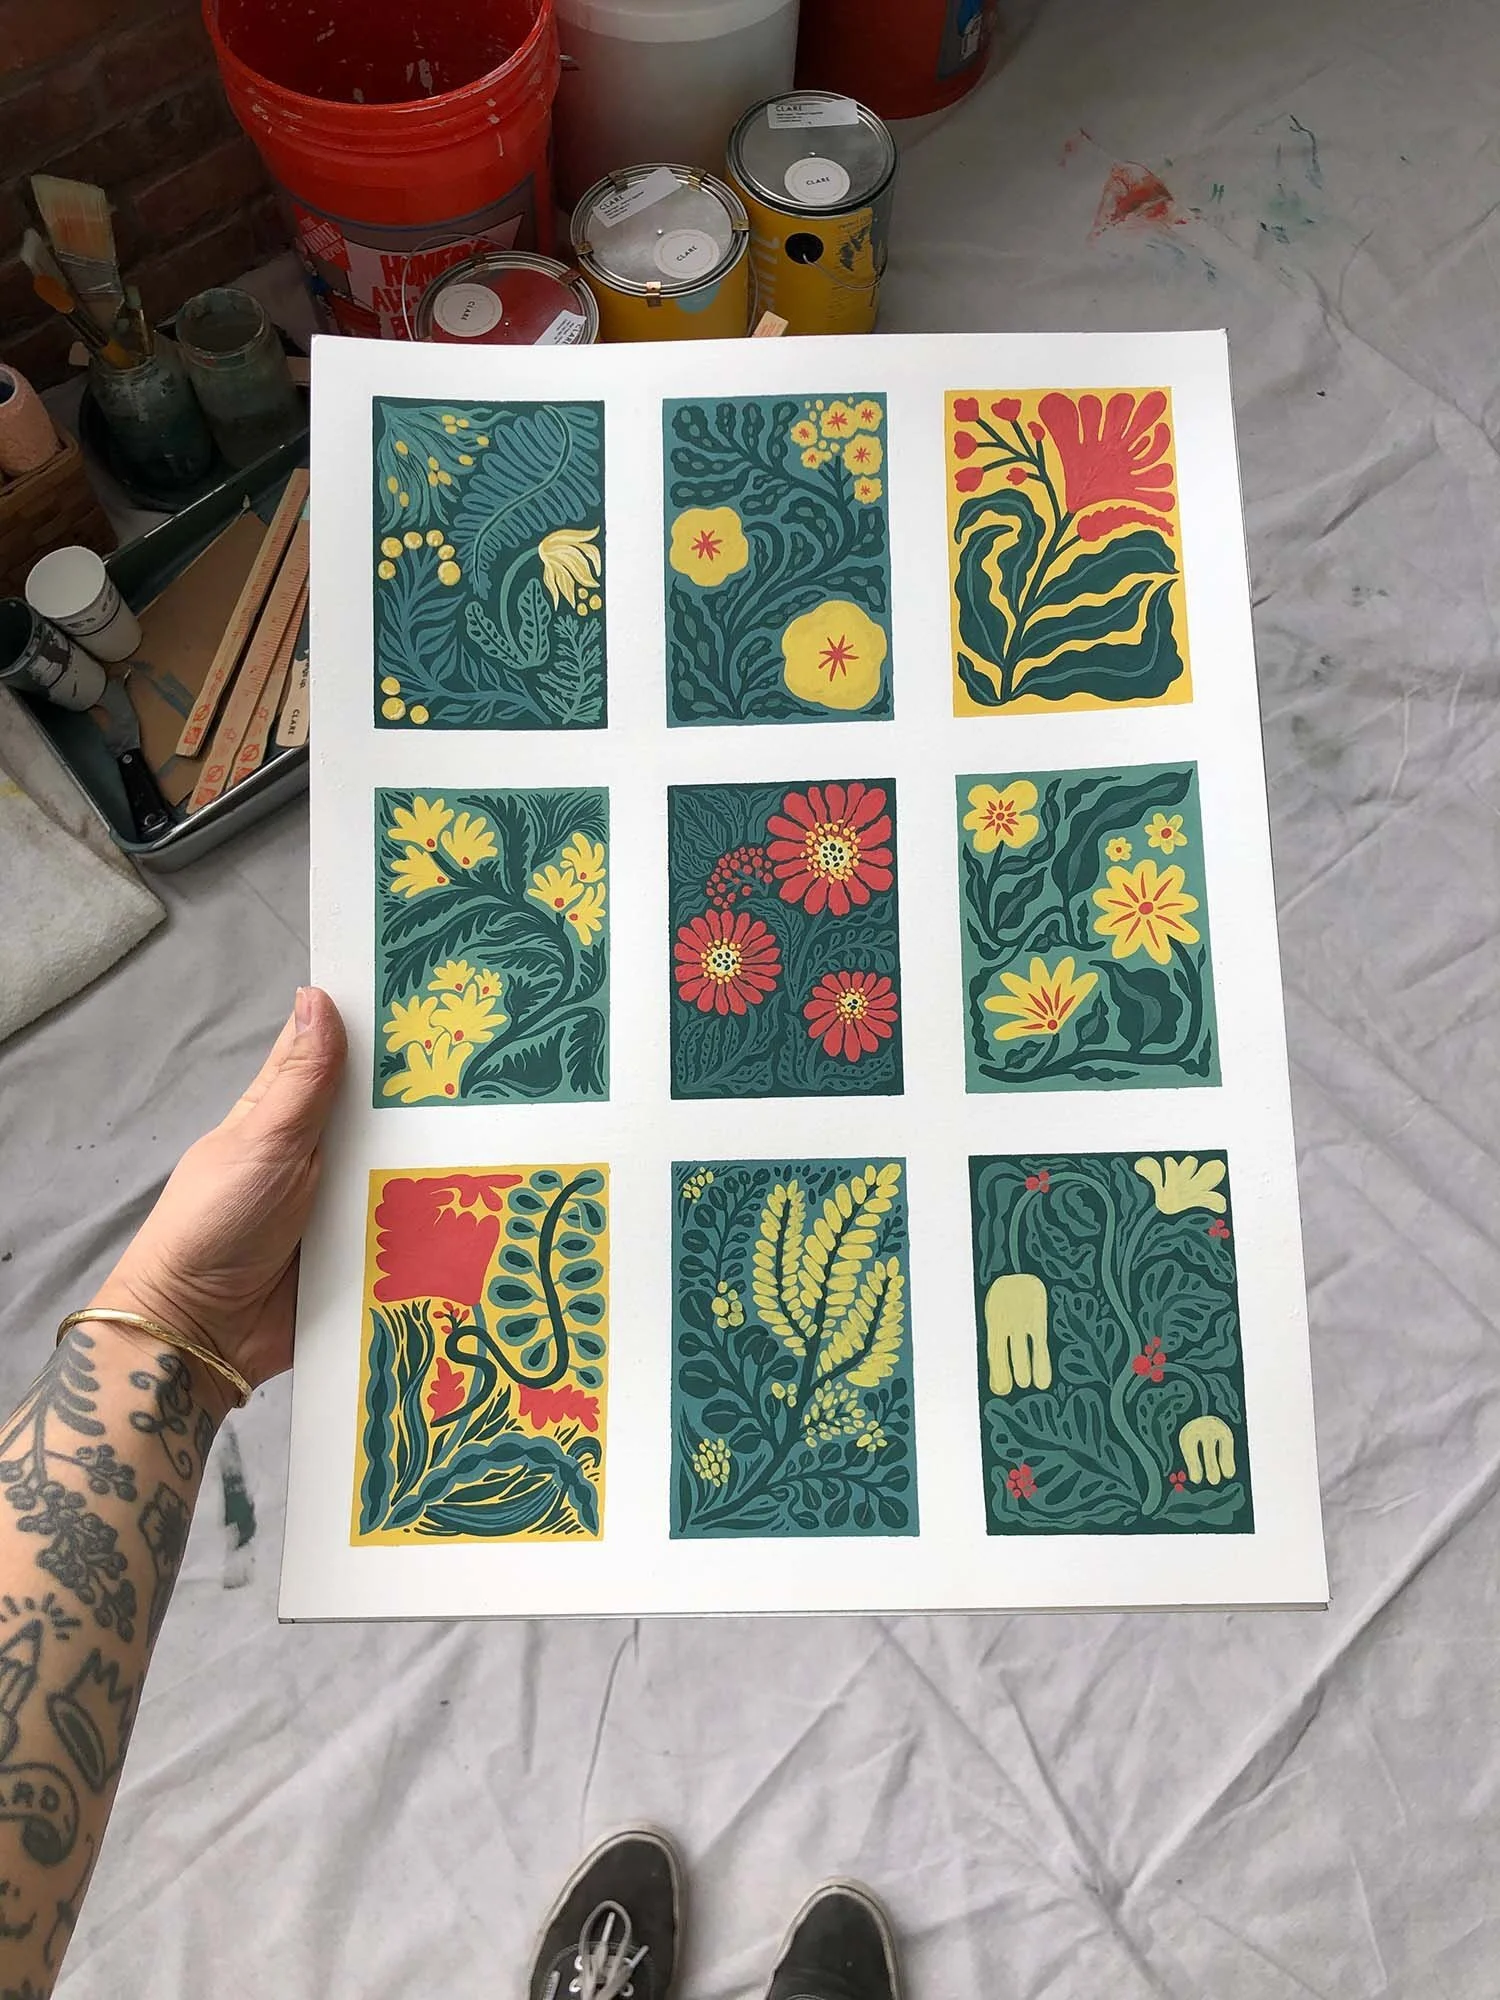
The gouache paintings that inspired the mural
Mandatory mid-mural pic for Instagram
A Fresh Coat of Paint
If this kitchen makeover was a middle school group project, the paint would be the person doing most of the work. Both of the main colors come from the brand Clare: the yellow is Golden Hour and the green is OMGreen. I love their curated selection of colors (really helps with the dreaded creative choice paralysis), but the only downside is that they currently only sell 1-gallon buckets, which is how I ended up with leftover paint from my mural.

Though every surface is different, in general, I followed these approximate steps to paint everything:
Give the surface a light scuffing with 120-grit sandpaper
Apply one coat of primer
Apply 1-2 coats of paint
Apply 2-3 coats of clear protective finish
Tip: Get yourself a respirator (here’s the one I have) if you’re going to be painting and sanding a lot indoors, especially if you have limited ventilation. It’s been one of my favorite purchases since venturing into making/building things because it ensures I don’t breathe in any fumes or sanding dust.
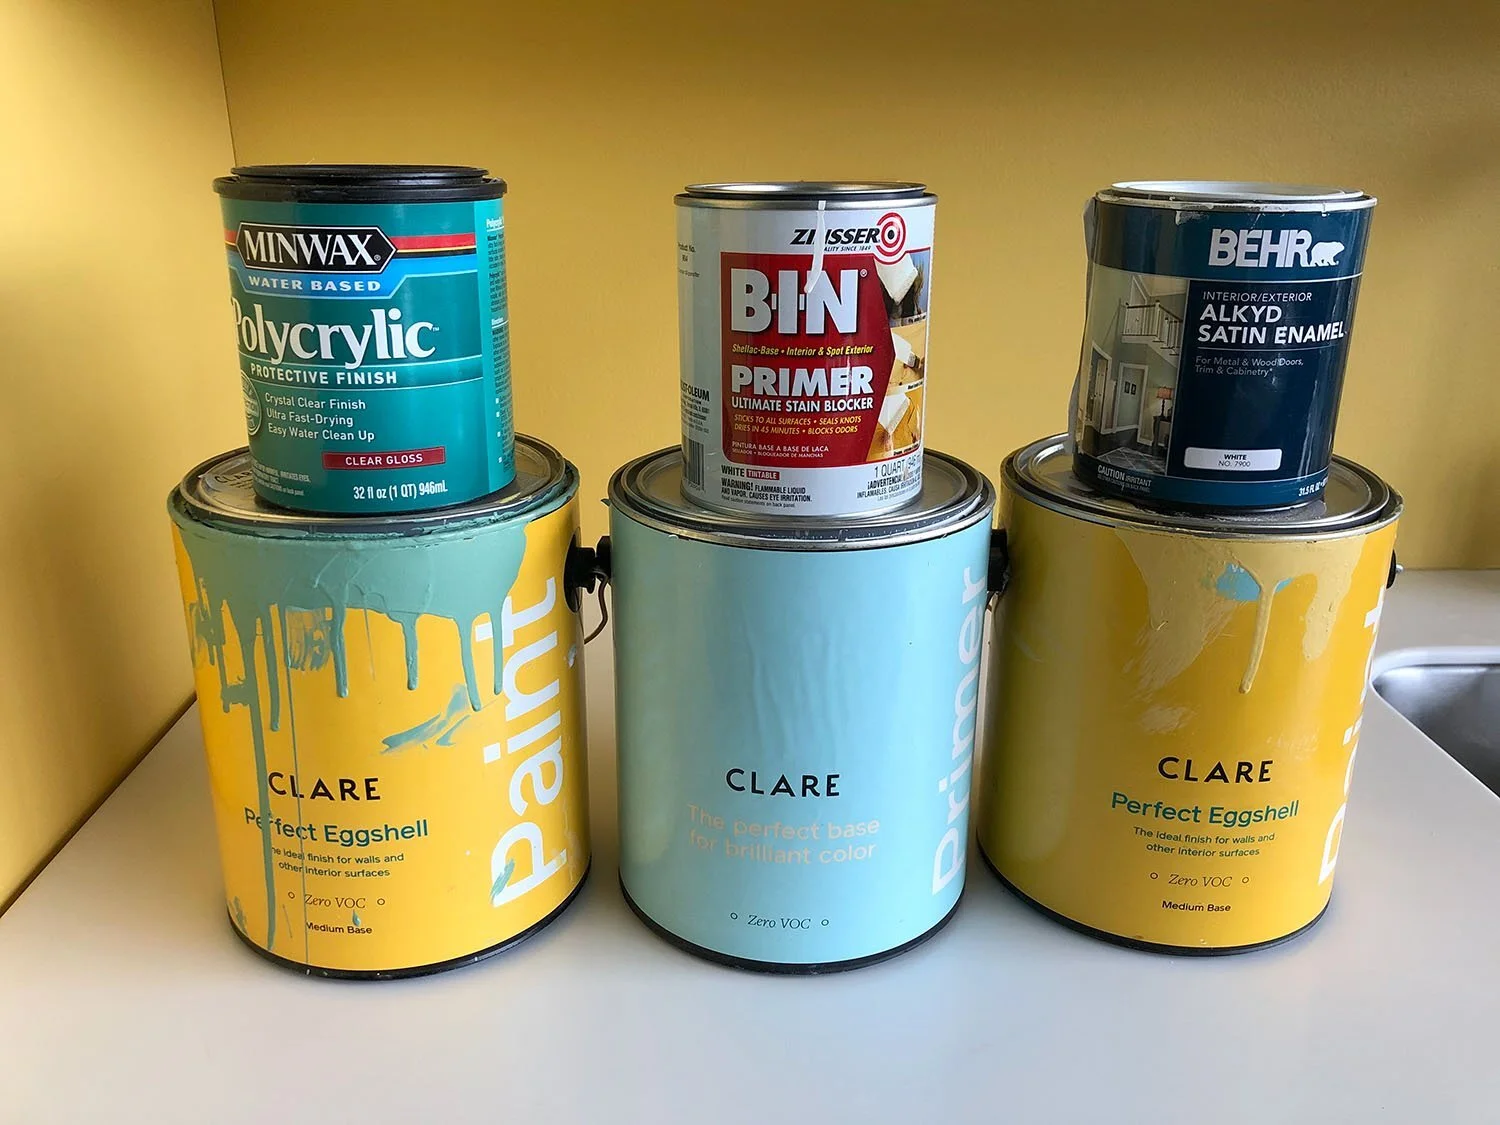
All of the paints I used to makeover my kitchen. Top row from L to R: Minwax Polycrylic Clear Gloss Water-based Polyurethane, B-I-N Shellac-Based White Interior Primer and Sealer, BEHR White Semi-Gloss Enamel Urethane Alkyd Enamel. Bottom row from L to R: Clare Interior Paint in OMGreen, Clare Interior Primer, Clare Interior Paint in Golden Hour
Here are specific notes on everything I painted:
WALL: This was the easiest because of my experience with murals. I sanded down bumps and applied two coats of paint.
UPPER CABINETS: I learned from my mistakes painting cabinets the first time around. I sanded off the existing paint, and then I primed with Clare primer and applied two coats of paint.
LOWER CABINETS: Same process as the upper cabinets with the addition of sealing with two coats of water-based Polycrylic for durability since the lower cabinets are more high-touch and prone to scuffs.
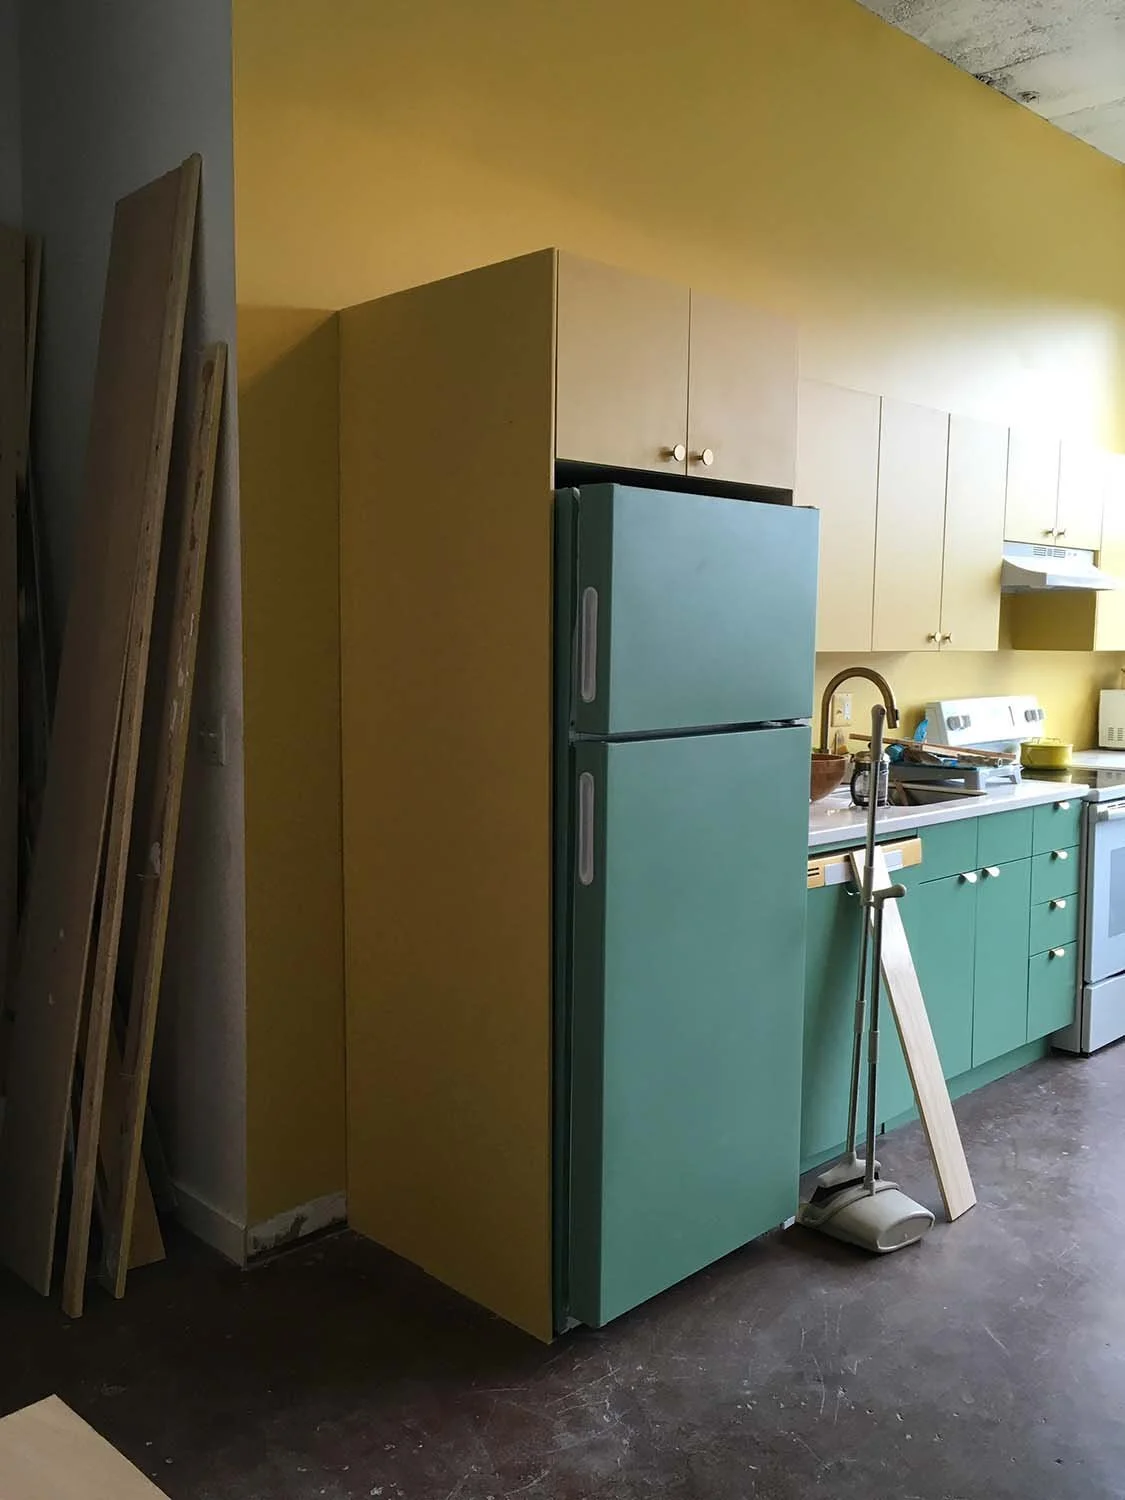
REFRIGERATOR: The surface of my fridge was metal coated with white paint/enamel. I pried the logo off with a metal putty knife after learning most of them are just stuck on with adhesive. Next, I sanded the smooth surfaces so the primer would adhere best, primed with BIN shellac primer for its durability and rust-blocking quality, applied two coats of paint, and sealed with three coats of water-based Polycrylic. For more tips on painting your fridge, check out this article I was interviewed for on Architectural Digest.
OVEN DRAWER DOOR: Exactly the same as the refrigerator, minus needing to pry off a logo. Based on internet research and my own tests, I determined the drawer door would be safe to paint since it was barely warm to the touch with the oven running.
DISHWASHER: The entire front was made of smooth plastic, and I followed the same process as the other appliances. I used gold leaf paint I had laying around to paint the top surrounding the control panel and sealed it with three coats of water-based Polycrylic.
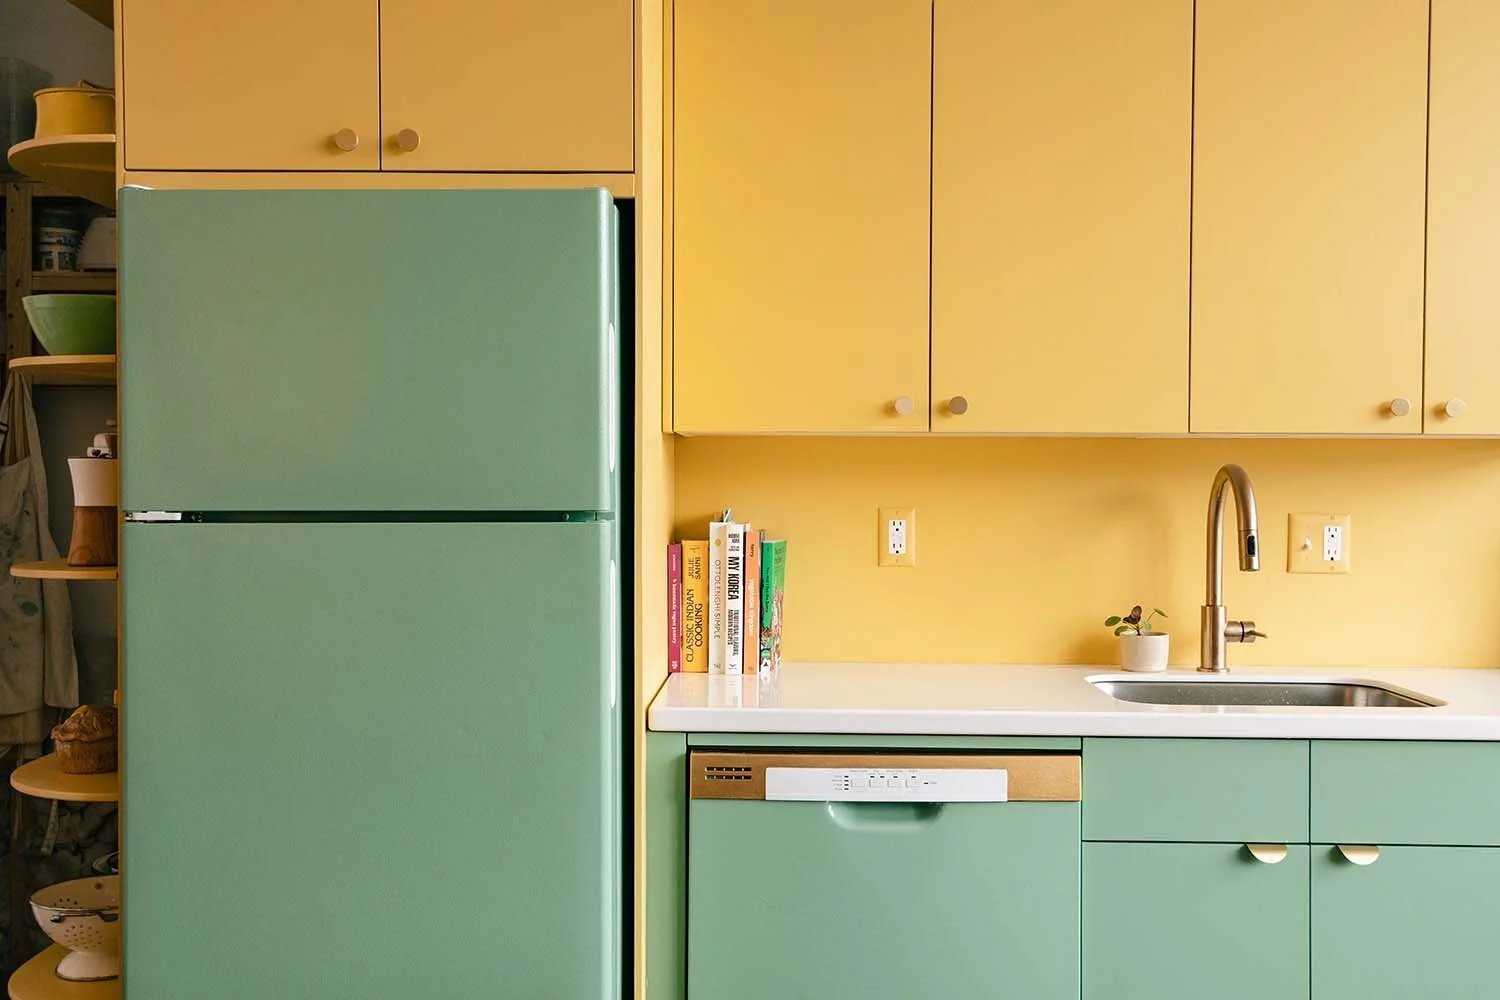
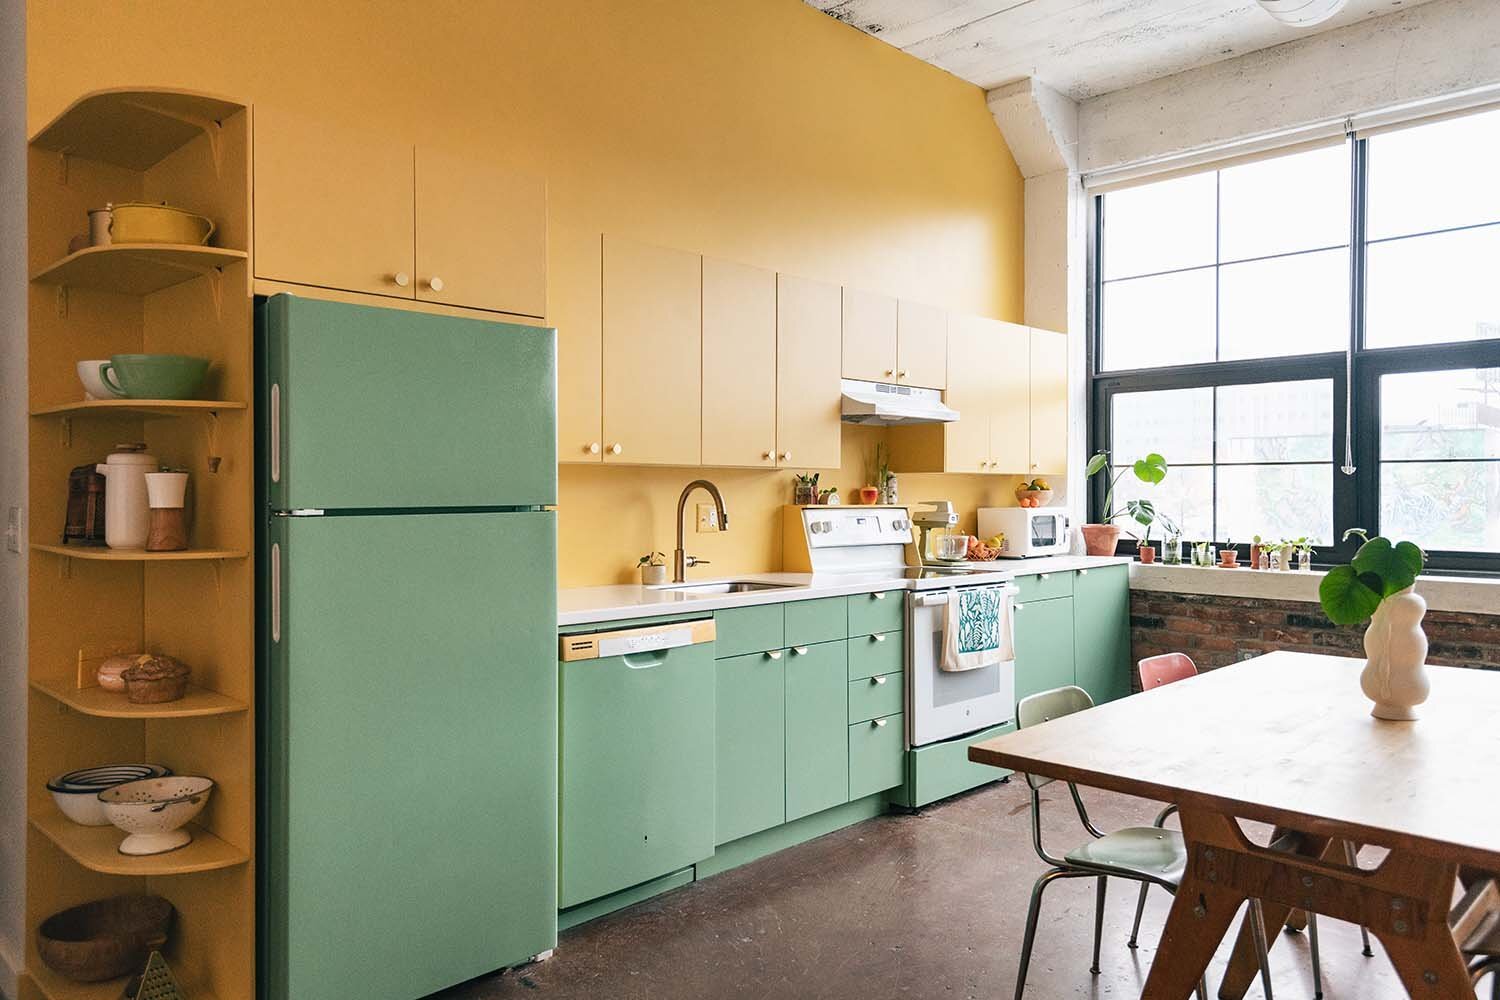
My hand painted green refrigerator and dishwasher in all their glory
I’ll admit, I was hesitant to paint my appliances because, well, I’d never been allowed to before. But my curiosity combined with an unwillingness to buy anything with the word SMEG on it (click here if you want to know why lol) ultimately led me to give it a try. My appliances weren’t fancy, so I felt more comfortable taking a risk knowing that the worst that could happen was having to try painting them again.
And what about the durability, you ask? It’s been a little over two months of these appliances getting touched every day, and I haven’t encountered any scuffs, scratches, or chips yet. I’ll update this post later this year to let you know how they’re holding up.
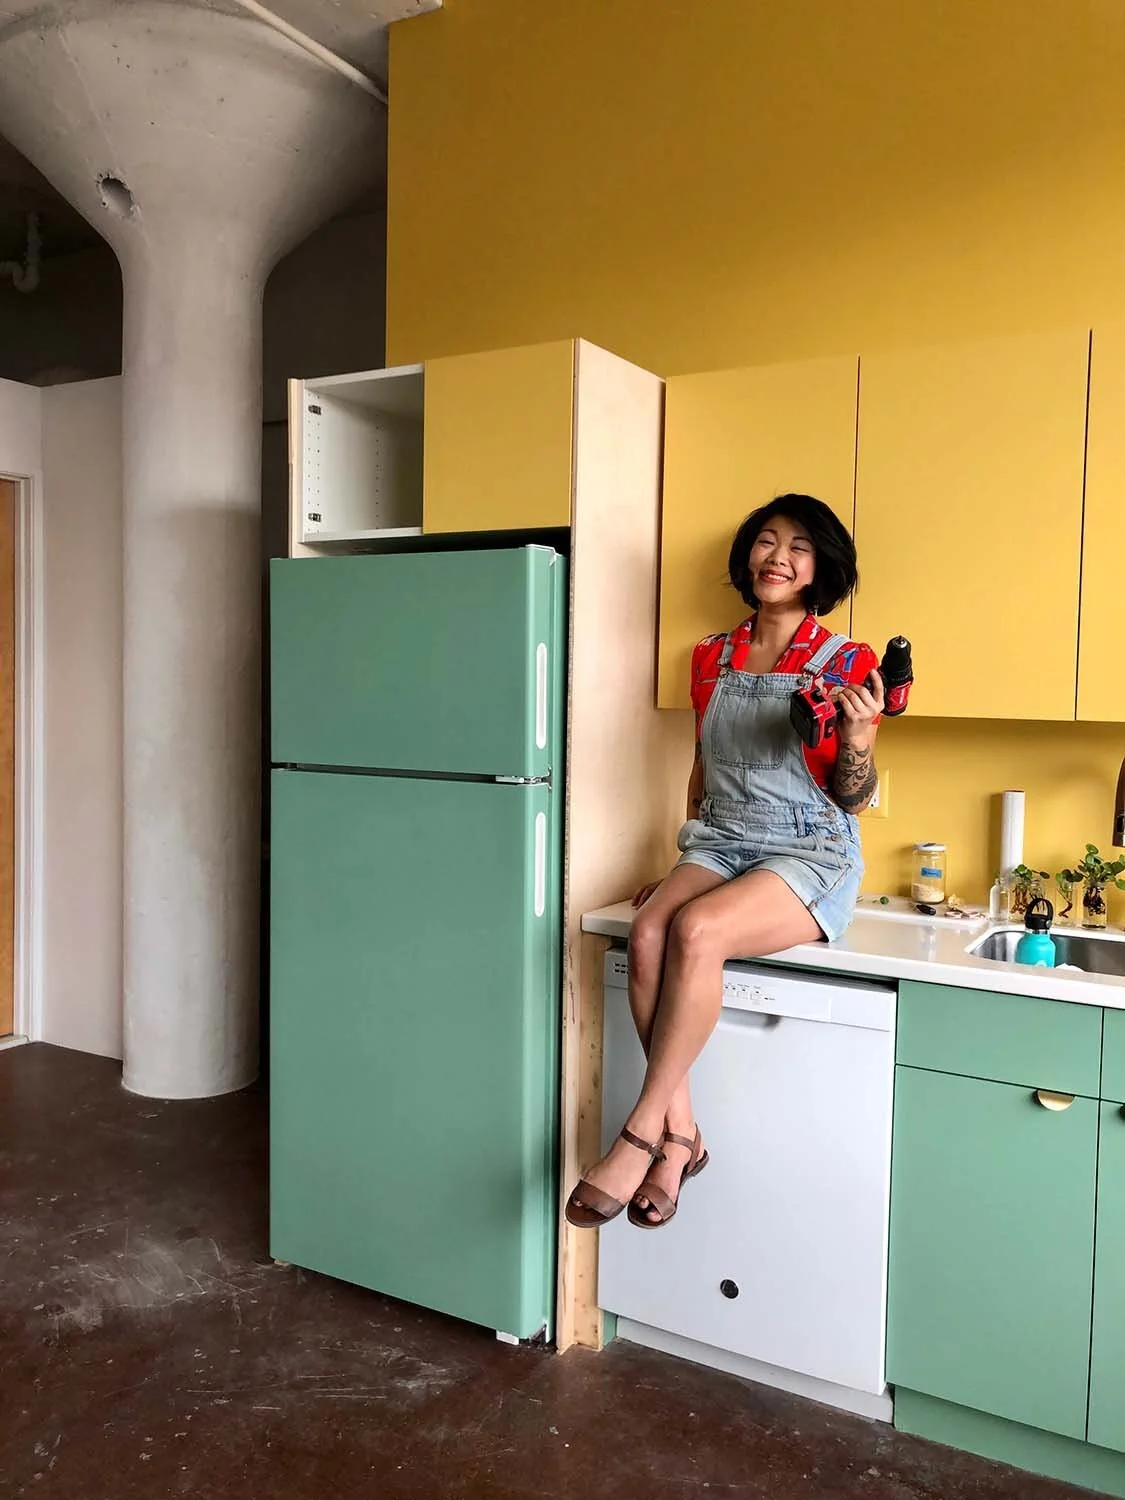
Added Storage
Moving the refrigerator to the other end of the single-wall kitchen turned out to be the key to unlocking it’s storage potential (not to mention letting more light into the room). Luckily, the original cabinets and doors, though sparse, were standard sizes and in pretty good shape, which gave me something to work off of.
My Crafty IKEA Hack
After measuring the space between the oven and the window, I realized the DIY stars had aligned because an inexpensive KNOXHULT cabinet from IKEA would fit perfectly into the space. I knew with some creative painting, I could camouflage the small differences between it and the original cabinets/counters.
I sanded the wood laminate surface to scuff it up, applied one layer of primer, painted on two layers of BEHR Alkyd Satin Enamel, and sealed it with three coats of water-based Polycrylic in Clear Semi-Gloss (to match the sheen of the other countertop). I waited a few days before placing anything on the surface just to be sure the paint was fully cured and durable.
Tea towel by Katharine Watson
If you look VERY closely, the KNOXHULT countertop is slightly less thick and the top drawer is shorter. This might bother some, but after doing the math and seeing how much money I could save with this hack (about $1,000), my thriftiness won out. My grandma would be proud.
The upper cabinets came pre-built from Lowe’s, and I hired a handyman from TaskRabbit to mount them. I used this 30” Hugo&Borg cabinet plus another 15” cabinet. Once the upper cabinets were mounted, I caught a tiny detail that I’d missed when buying them: the doors didn’t quite extend all the way to the edges of the cabinets like the rest of the doors in the kitchen (maybe ¼ inch short). IKEA saved the day when I discovered they sold affordable doors that did extend to the edges of the stock cabinets.
DIY Refrigerator Cabinets + Shelf
I built the cabinet surrounding the refrigerator with the help of this tutorial and another IKEA cabinet. It’s essentially a cabinet sandwiched between vertical two 1” plywood panels that I had cut down to size at my local Lowe’s. I mounted the structure to the wall and the side of the existing cabinets, which not only made it more secure but also feel built-in with the rest of the kitchen.
If you follow me on Instagram, you might know how I feel about open shelving: it looks cute in photos but is actually a pain in the ass IRL (being able to stuff my closed-door cabinets to the brim with mismatched jars, mugs, and half-eaten bags of snacks is my kink).
However, I made an exception for these rounded shelves I added on the side of the fridge cabinet because 1) they’re far away from potential splatters/grime from the stove and 2) I wanted to try making round shelves. In this rare instance, their cuteness outweighed their pain-in-the-ass-ness, so I cut the shapes out of 1” plywood with a jigsaw, sanded down the edges, and mounted them with metal brackets.
Tip: if you don’t have the power tool you need for a project, consider borrowing one from someone in your community or contacting a local woodworker to see if you can pay them to make the cuts for you.
Hardware
Swapping out the old cabinet and drawer handles made WAY more of an impact than I expected. I found both the brass drawer pulls and brass cabinet knobs on Etsy. After removing the old handles, I filled the holes with wood filler, sanded them smooth, and painted the cabinet doors and drawer faces with their new colors. Then I installed the new hardware with a power drill and the screws the hardware came with.

Shop similar brass hardware:
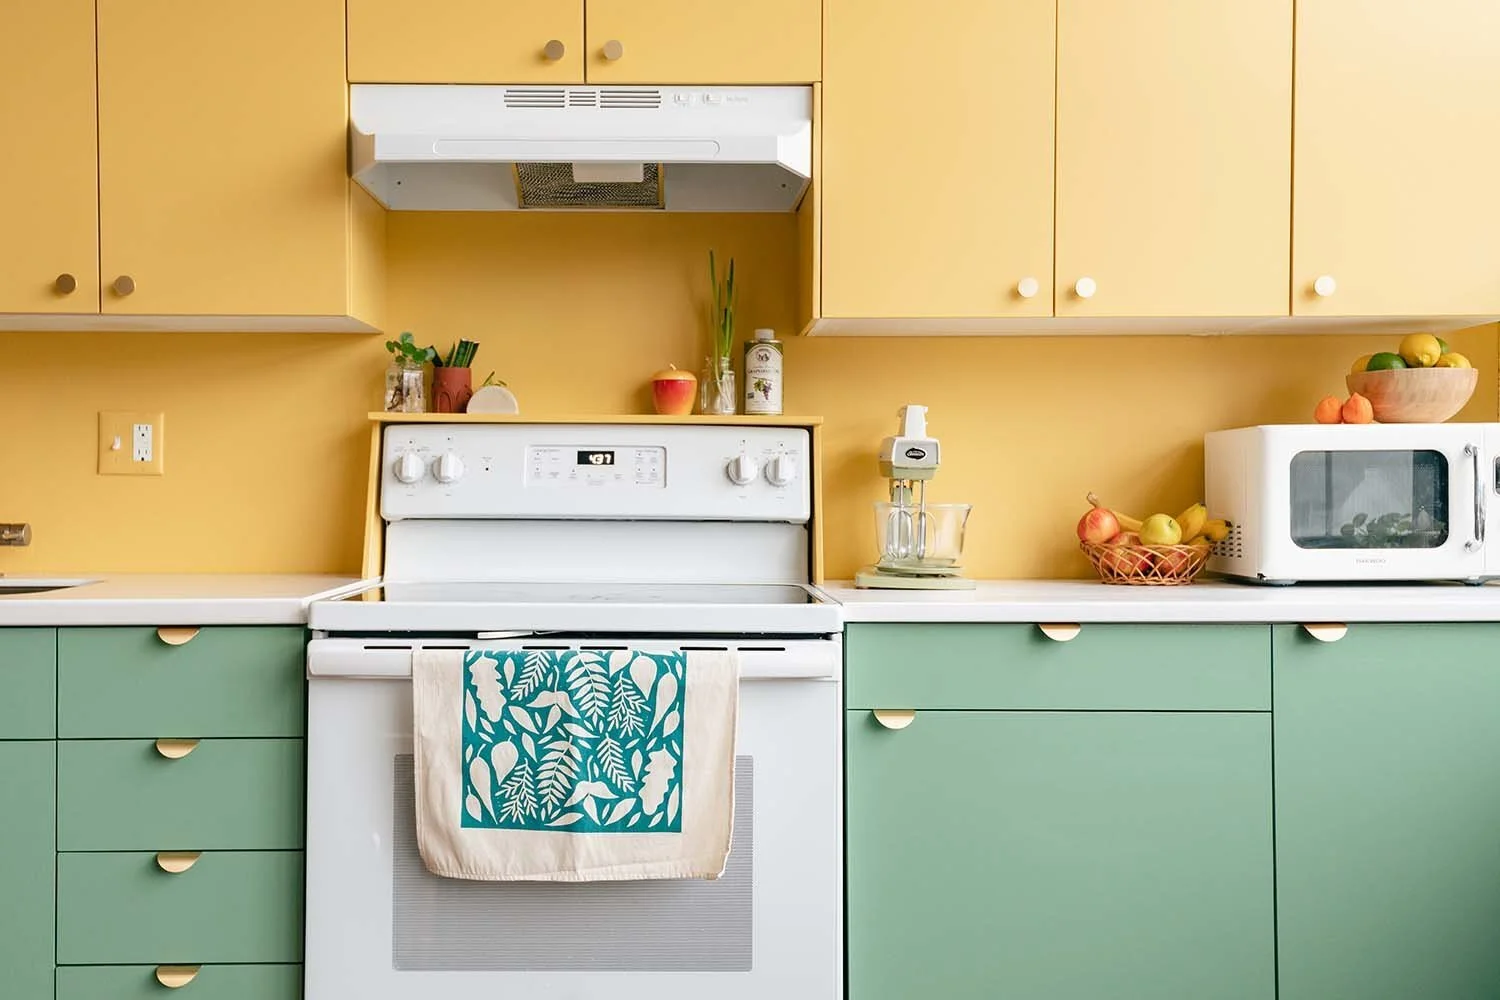
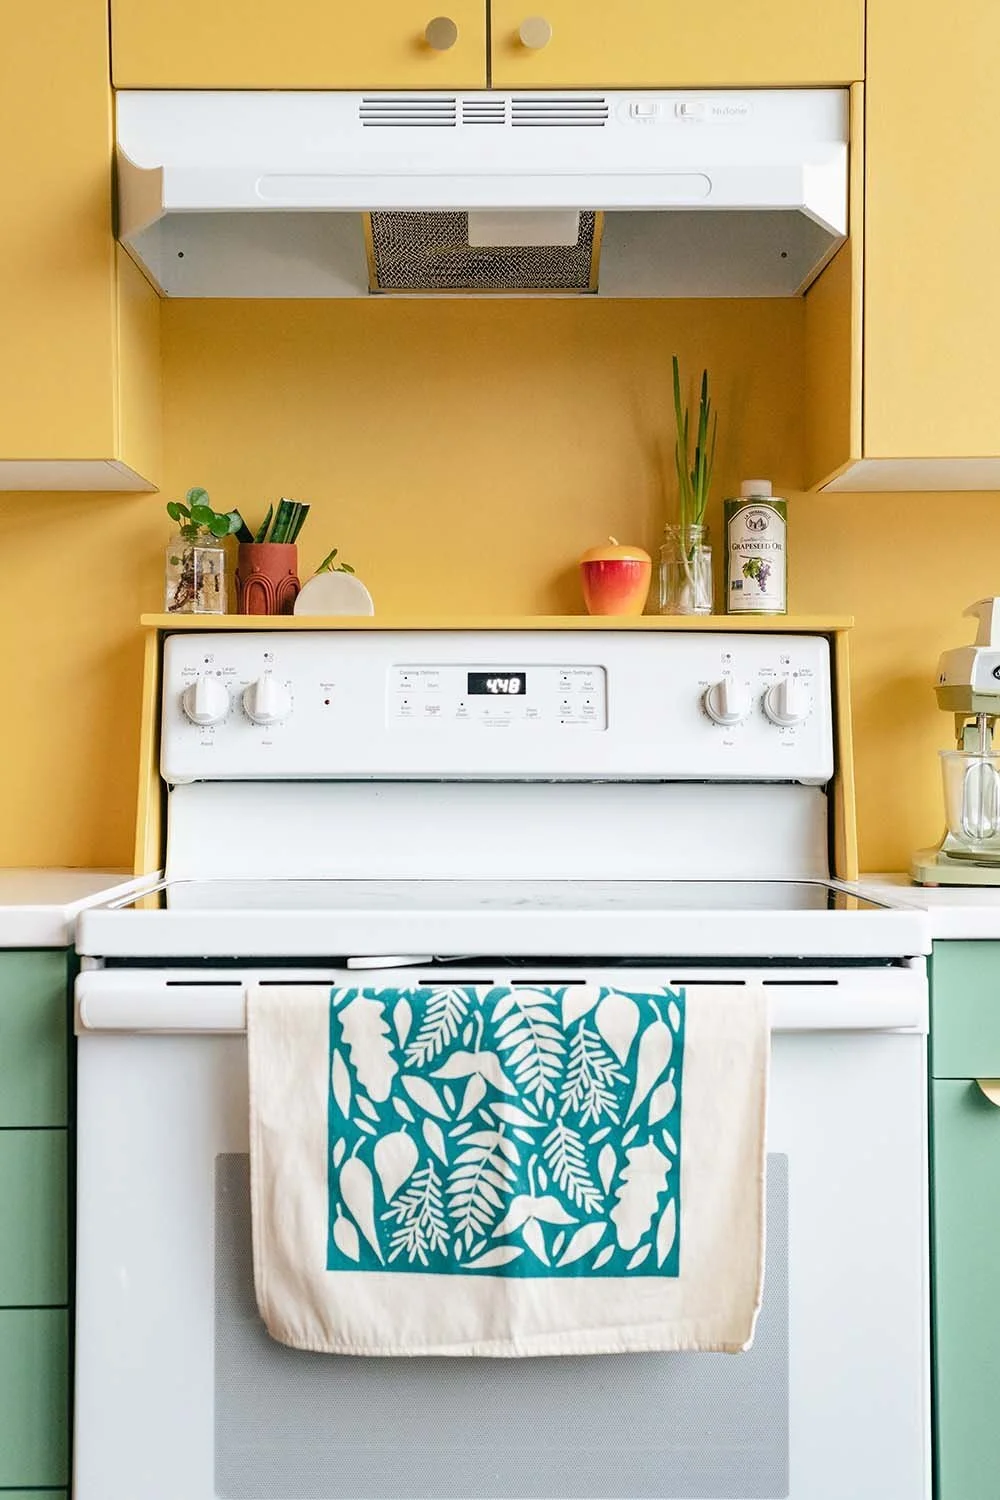
The Little Shelf Over the Oven
Just when I thought the kitchen was complete with the added storage and fresh coats of paint, I noticed the area above the stove felt less considered than the rest of the space. The top of my stove display is slightly rounded, so I thought this shelf would 1) give me a flat surface to put small items and 2) make the stove feel more built-in.
Tea towel by Katharine Watson
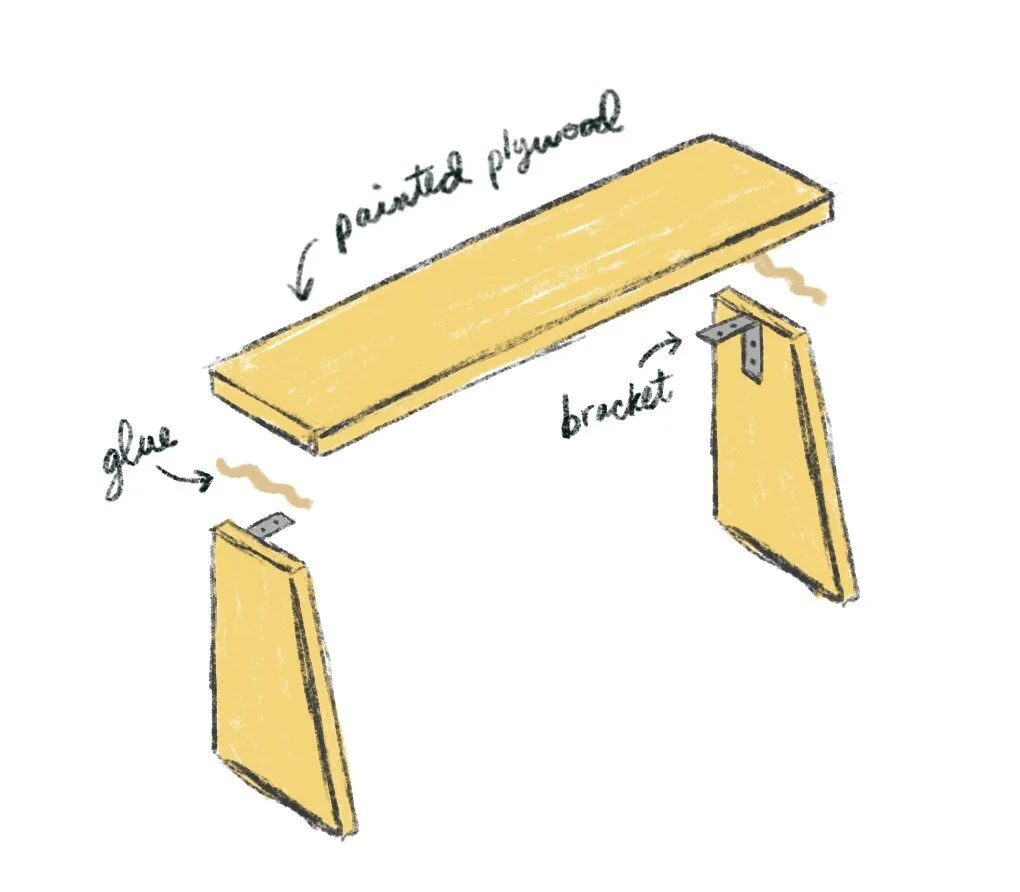
I built it using scrap 1” plywood, a hand saw, wood glue, two 3” metal corner brackets, and 1/2” wood screws.
I leaned on my design brain to figure out how to make it instead of looking up a tutorial (yay for having a curious mind and busy hands). The shelf is basically just a wooden rectangle sitting on top of two trapezoids and secured with a little wood glue + an inside bracket where the pieces meet.
Styling
To balance out the modern look of the flat panel cabinet doors and solid, bright colors, I styled the kitchen with an eclectic mix of furniture and materials. Many of these items were sourced from vintage sellers and second-hand shops, which is fun for me and good for the planet. The downside is that it’s hard to link to them for others to shop, so I’ve included links to similar items if you like anything in my space.
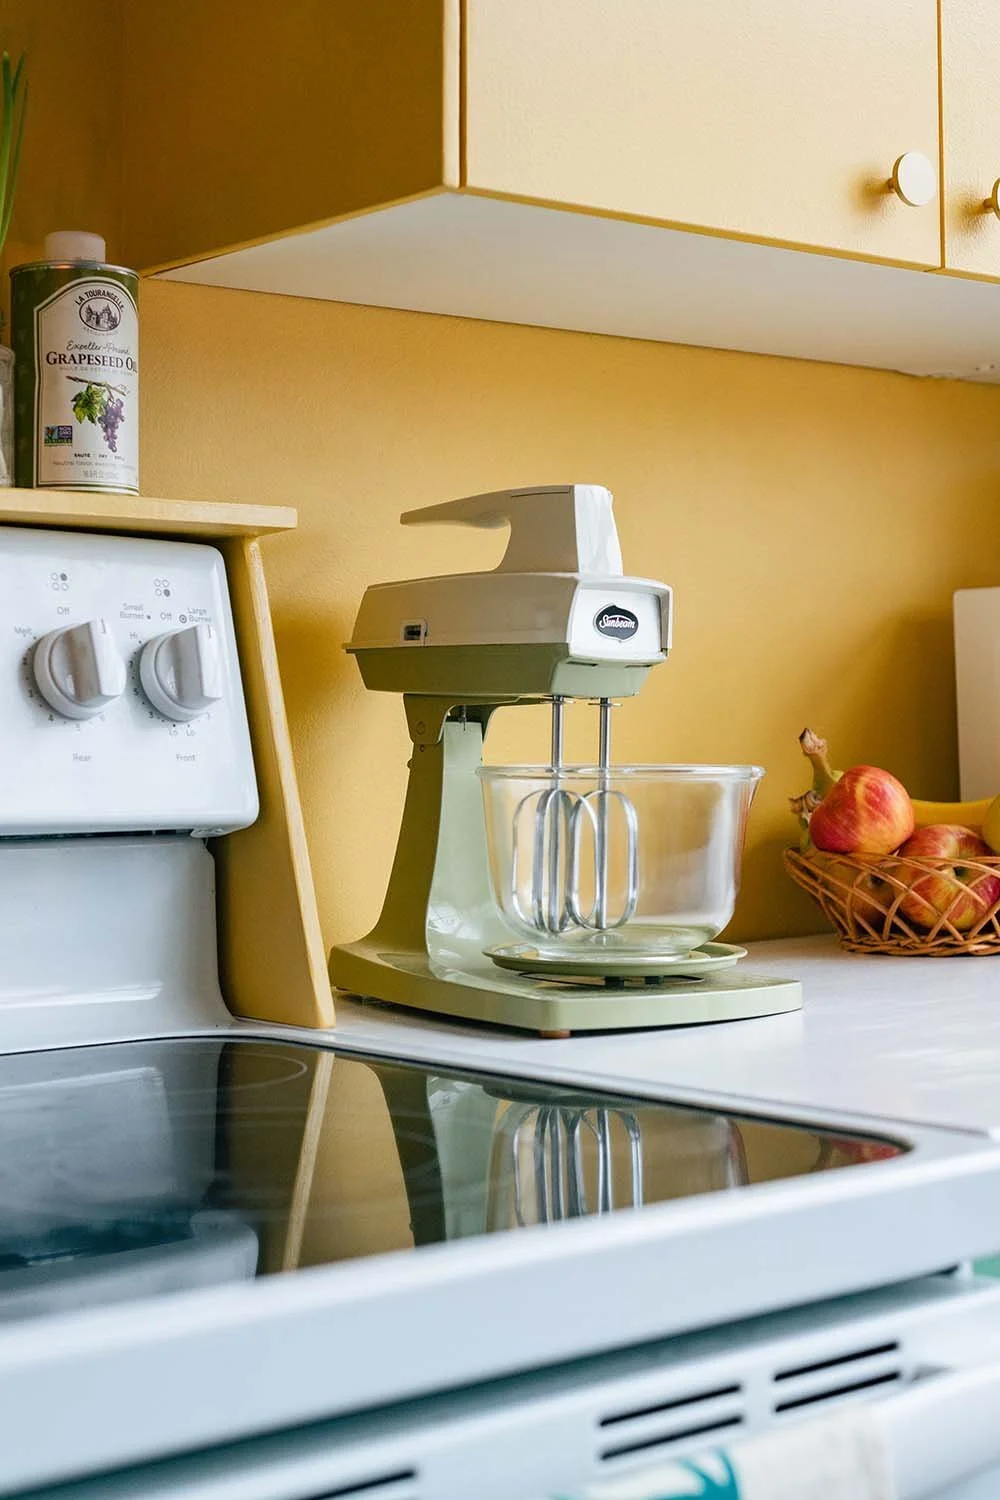

Similar green stand mixers:
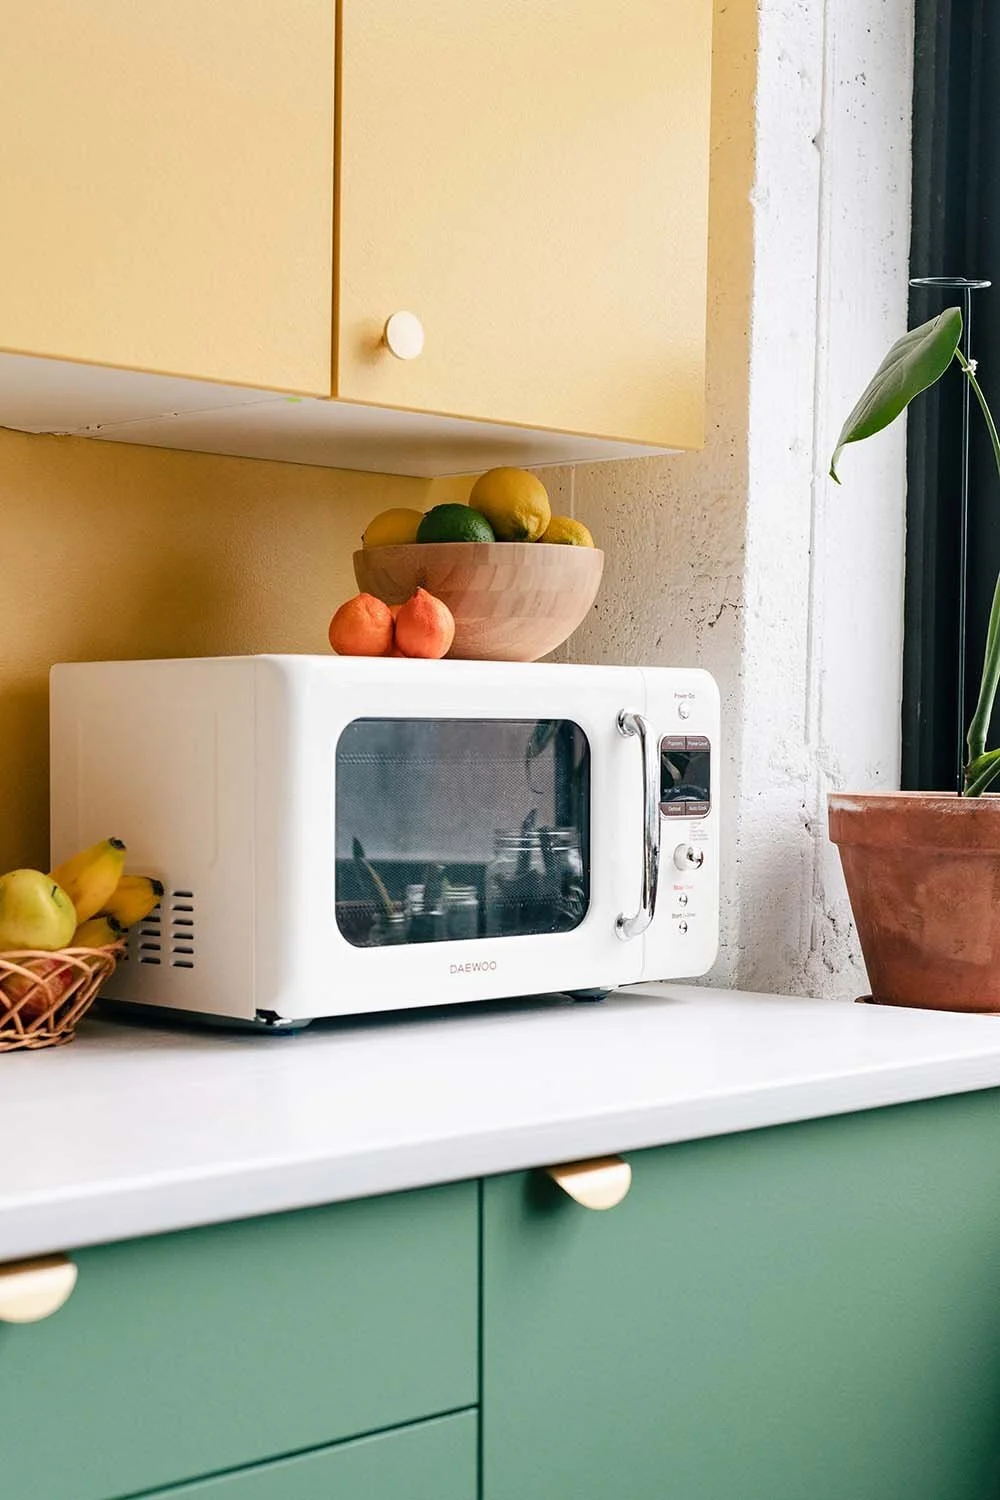
Similar white retro microwaves:
Similar vintage Heywood Wakefield school chairs:
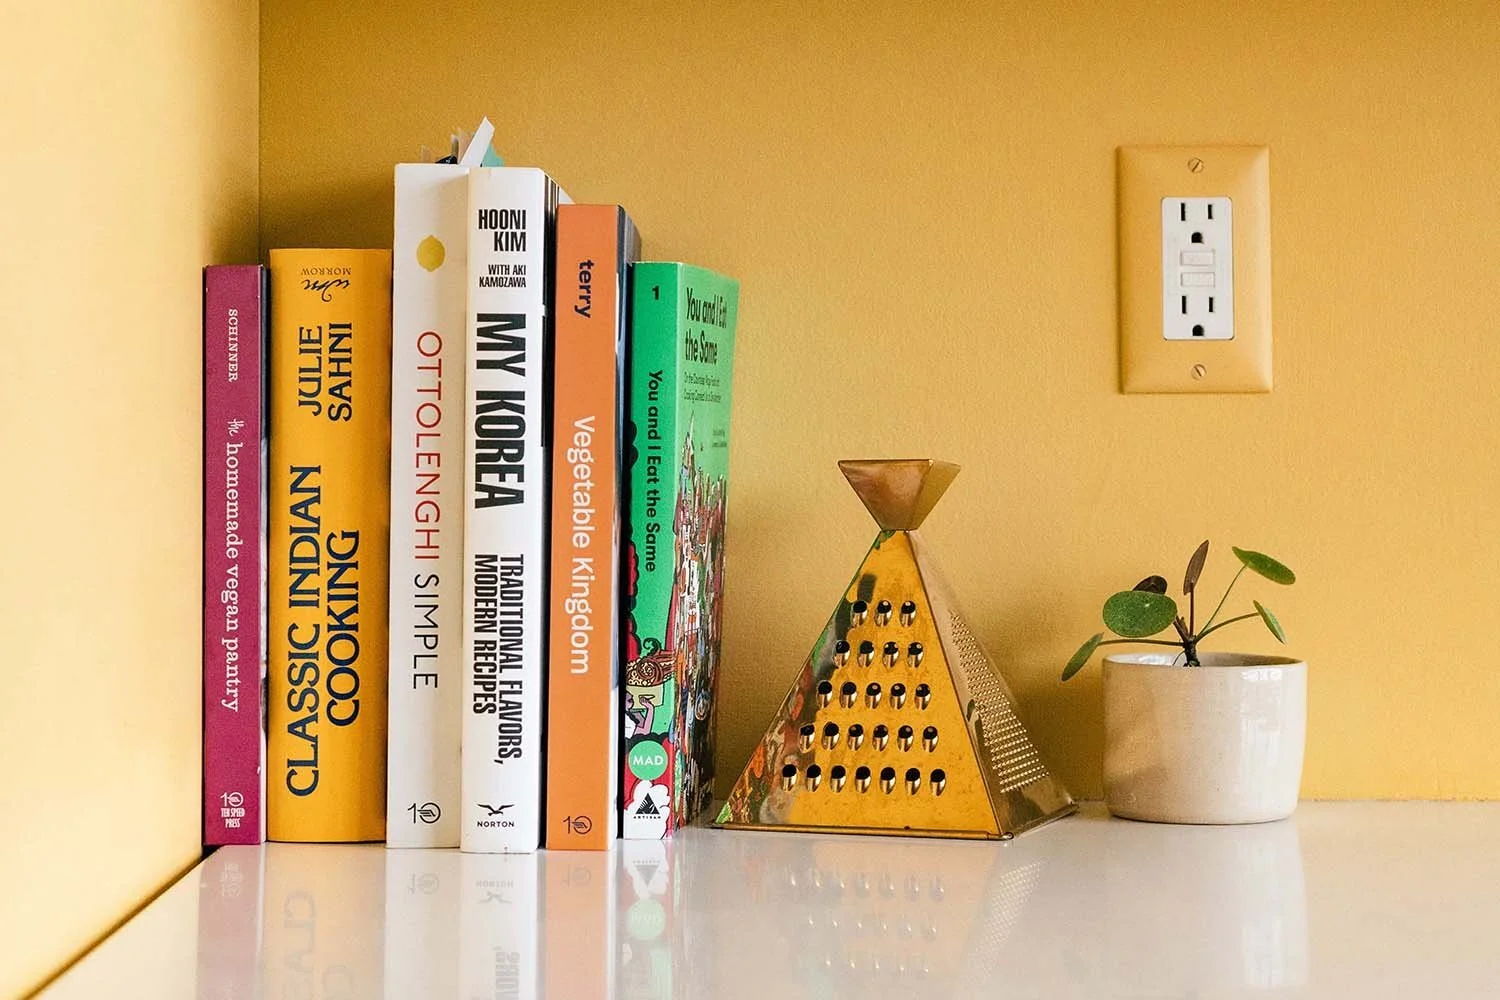
Cookbooks:
The Homemade Vegan Pantry by Miyoko Schinner
Classic Indian Cooking by Julie Sahni
Ottolenghi Simple by Yotam Ottolenghi
My Korea: Traditional Flavors, Modern Recipes by Hooni Kim
Vegetable Kingdom by Bryant Terry
You and I Eat the Same by MAD Dispatches (not a cookbook but a collection of food essays)
Final Thoughts and Takeaways
Like I mentioned earlier, I’ve been gifted (or cursed???) with a curious mind and busy hands my entire life, so doing this entire kitchen makeover myself was incredibly satisfying. I’m sure I could’ve tackled this project more efficiently had I done a lot of planning in advance, but I really enjoyed problem-solving as I went and updating a few things at a time.
In total, I spent about $2,000 and four months of my spare time taking the one-wall kitchen from the Before to the After photos at the beginning of this blog post. It was very on-and-off because my work schedule varies a ton as a freelance designer, but since I worked on small sections at a time, the kitchen was always functional throughout the renovation.
Doing everything myself gave me an appreciation for the work that professionals do. If I factored in my hourly design rate with the time I spent redoing the kitchen, I’m almost positive it would’ve been cheaper to hire someone else to do it haha. But if you’ve made it this far in this post, you’ll know that this DIY wasn’t motivated by saving money. I’ll happily pay a professional in the future if I don’t have another DIY in me or I want something fancier.
I hope this in-depth look into how I used my design + mural painting skills to DIY my kitchen gave you some ideas for how you might update parts of yours one day!

